

I recently discovered a local scenery company called Wargame Model Mods and put an order in over lockdown. They did some of the better mdf xenos scenery on the market, and picked up one of their (very reasonably priced) Chemical Silo to see what it was like. I had a few tubular buildings of my own built from Christmas snacks, and thought this would round out the collection very nicely.
pakidge
I barely had time to clear some space on my bench before it arrived. My house was soon awash with the blissful smell of lasercut wood once more.
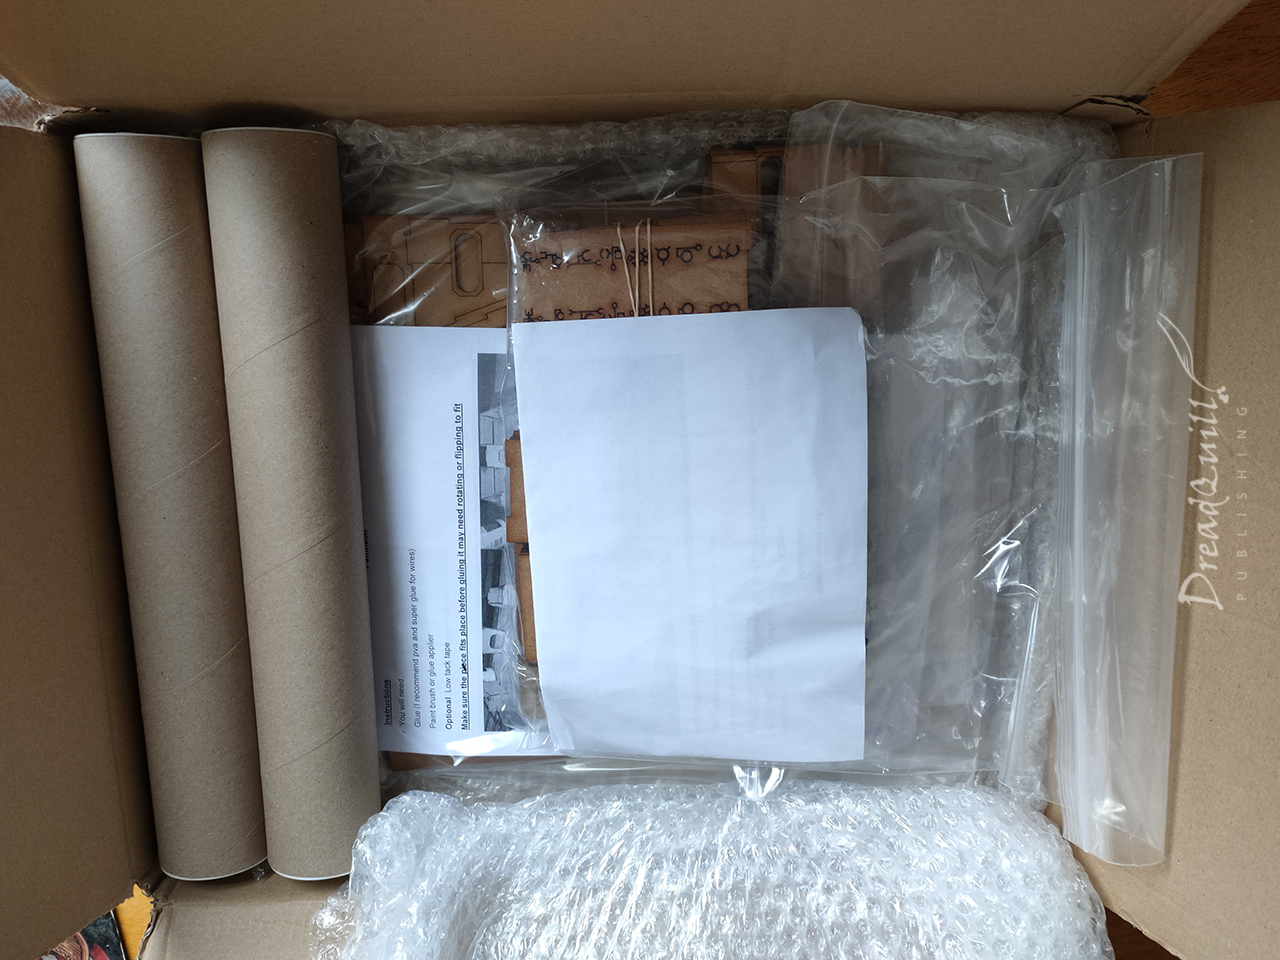
Such neat little packages! Most of the components came pre-punched, bundled and baggied for ease of identification – something I’d not encountered before in my many years of scenery building. I’d ordered three kits – two of them filthy xenos technology – so I set the extra pieces aside while I worked on the silo.
Quality and quantity
I was impressed by the quality of the kit (especially for the price!), and the material was thinner and denser than other mdf kits from other suppliers. It made the whole kit much lighter than I expected, and the smaller pieces were much less liable to explode into dust.
The only real criticism I’d make is the instructions were a little sparse. It asked for certain named parts from the sprues (like walkway railings) but didn’t suggest which ones they might be.
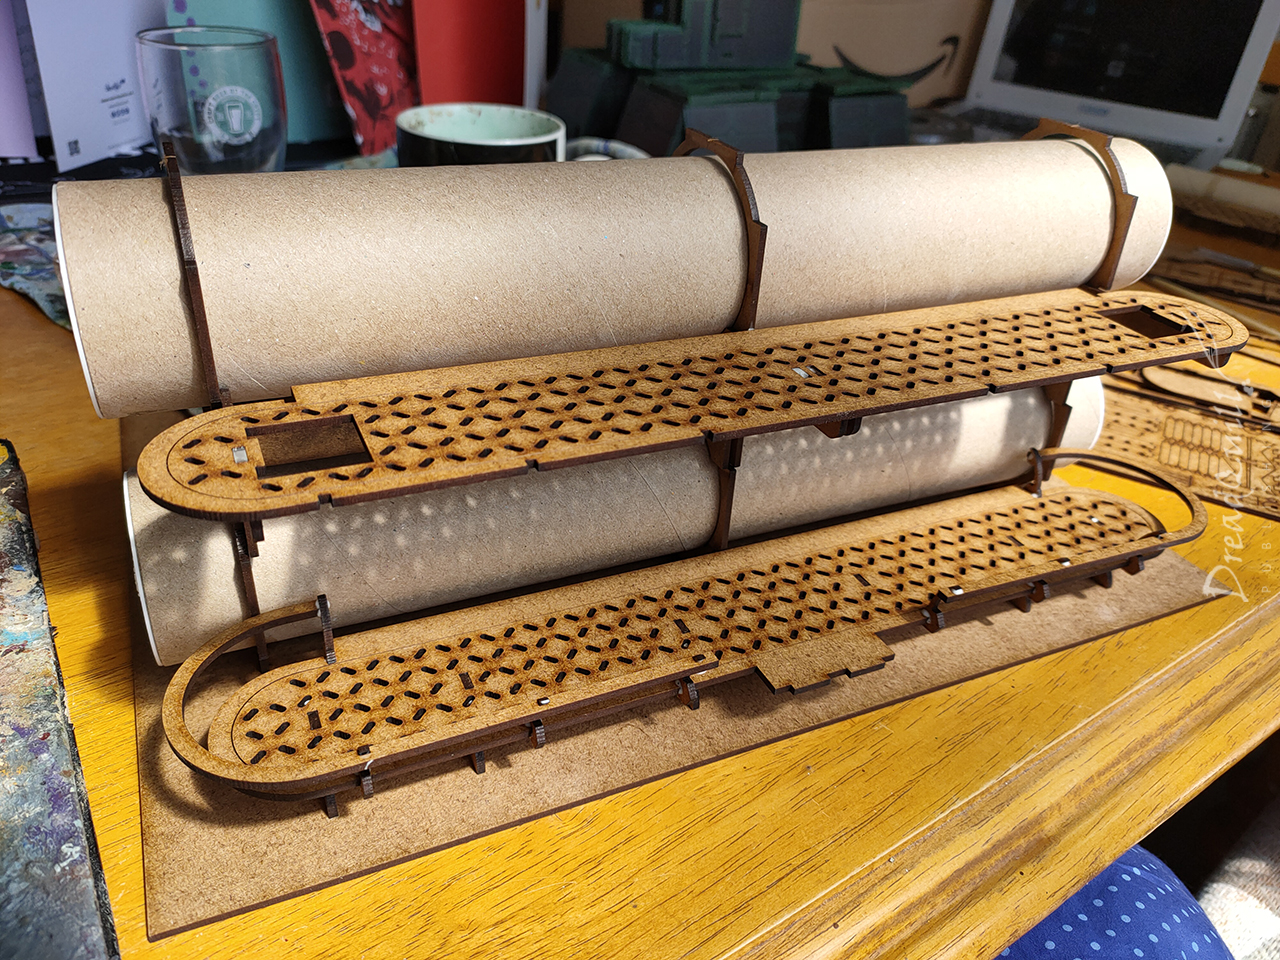
There are three simililarly-shaped walkway sections – two of which I put the wrong way round. It was straightforward to fix as the glue hadn’t dried yet, but some clearer images on the instructions or website would be a very easy fix to this problem.
Internal workings
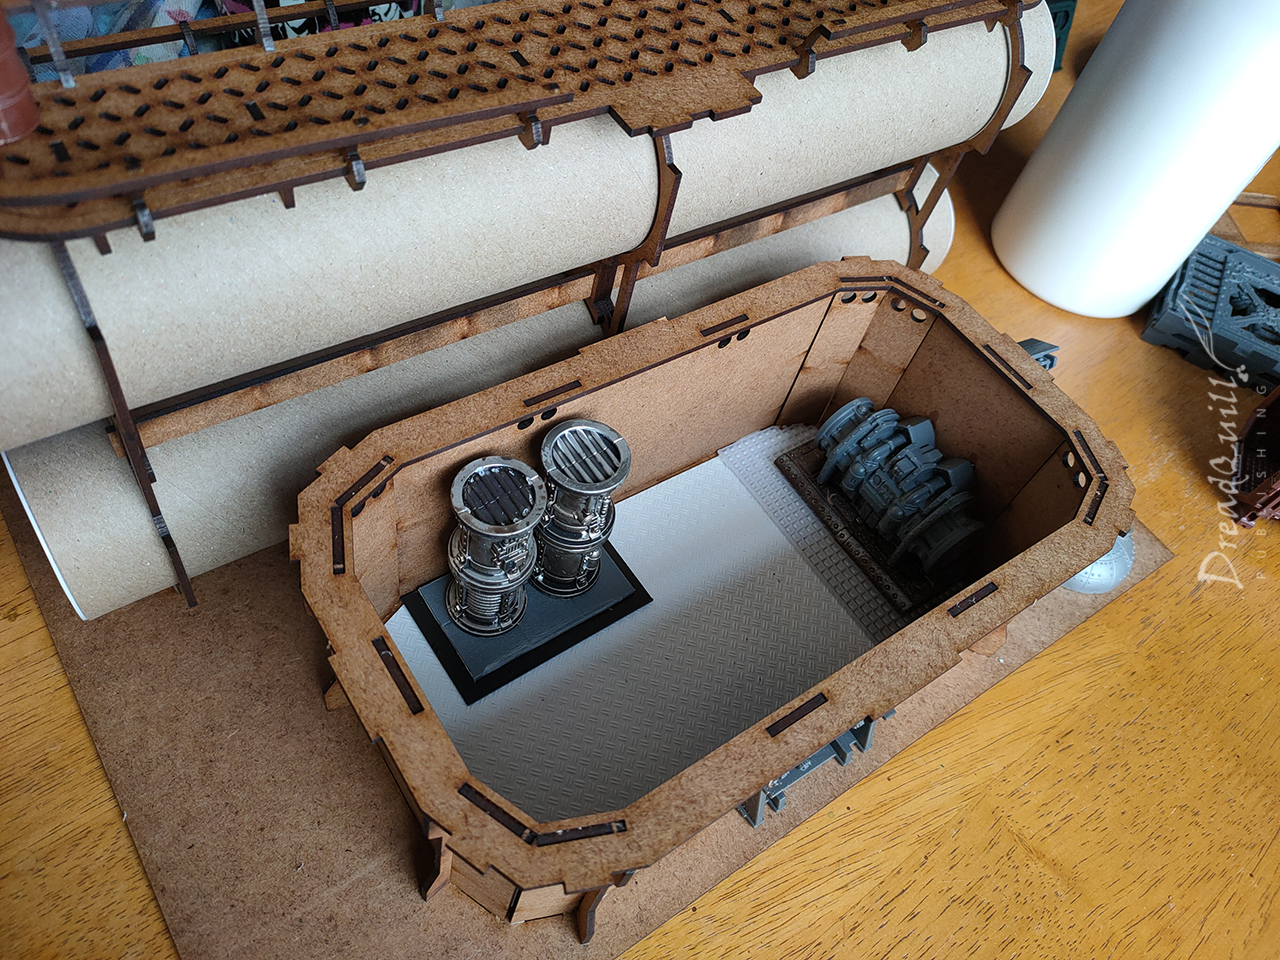
Removable roof you say? I’m a sucker for a good building you can put little toy soldiers in, so of course I’m going to assemble it with the optional removable roof. I laid down some textured plasticard to act as a floor.

All those little holes are for LEDs – you can spend a few extra gold coins on the webstore and get a fully-working lighting kit thrown in too. Nearly all their kits are designed specifically for moving parts or fancy wired lighting – how cool is that!
In my excitement, I fear I lost a vital piece of the puzzle. I must have misplaced a piece to use as the actual floor, so the plasticard just sat over a void in the base board. This isn’t particularly durable and sounds like a drum when you put a mini on it, so I reinforced it with bits of offcut sprue from the kit.

I had also taken it upon myself at this point to overcomplicate the task at hand. I had been sizing up different bits of plastic scenery to help blend this kit in with my collection, and although the kit came with its own mdf door, I had a neat GW pressure door from the (sadly discontinued) Rogue Trader Killteam set that looked perfect.
Unfortunately it meant hacking a huge hole in the side of the building and carving massive gouges from the door frame to fit.

When building scenery, I like to design with playability in mind first. Why would players want to send their gangers into/on top of these overly-intricate creations? Usually for buildings, it’s because they have windows or ports to shoot from, giving them decent protection from any return fire.
There aren’t any windows on this little hut and I didn’t feel like agonisingly cutting into the dense fibreboard any more, so a new plan was concocted.
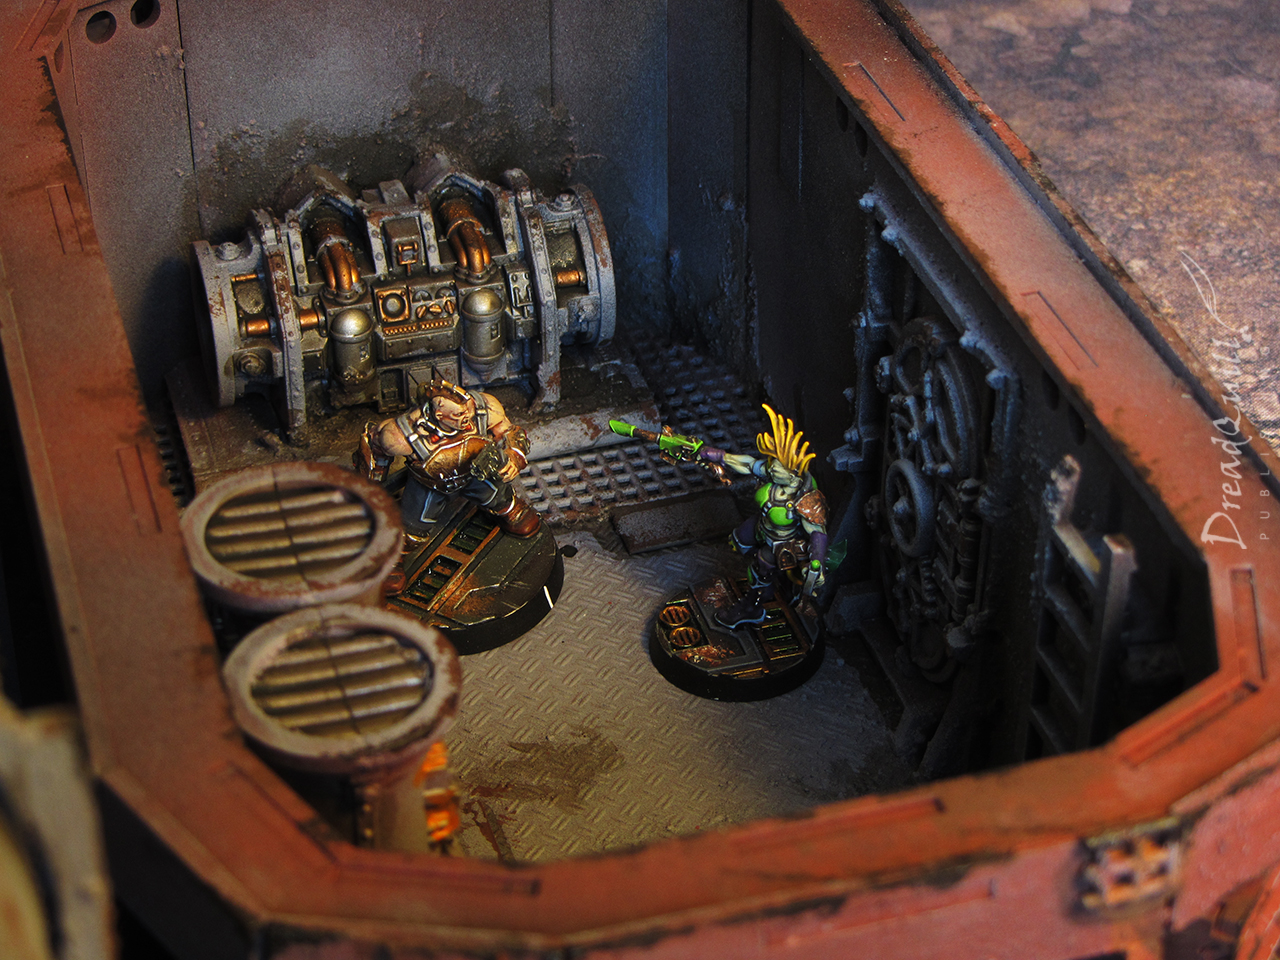
I kept it open enough so objectives could be placed inside – it’s a secure enough location, and gangers might want to stash things inside. A couple of tubes and consoles gives a loose implication of the shack’s original purpose – perhaps some kind of monitoring station for whatever is in the silo? Whatever it is probably isnt working any more, and the silo has been repurposed by entrepreneurial individuals.
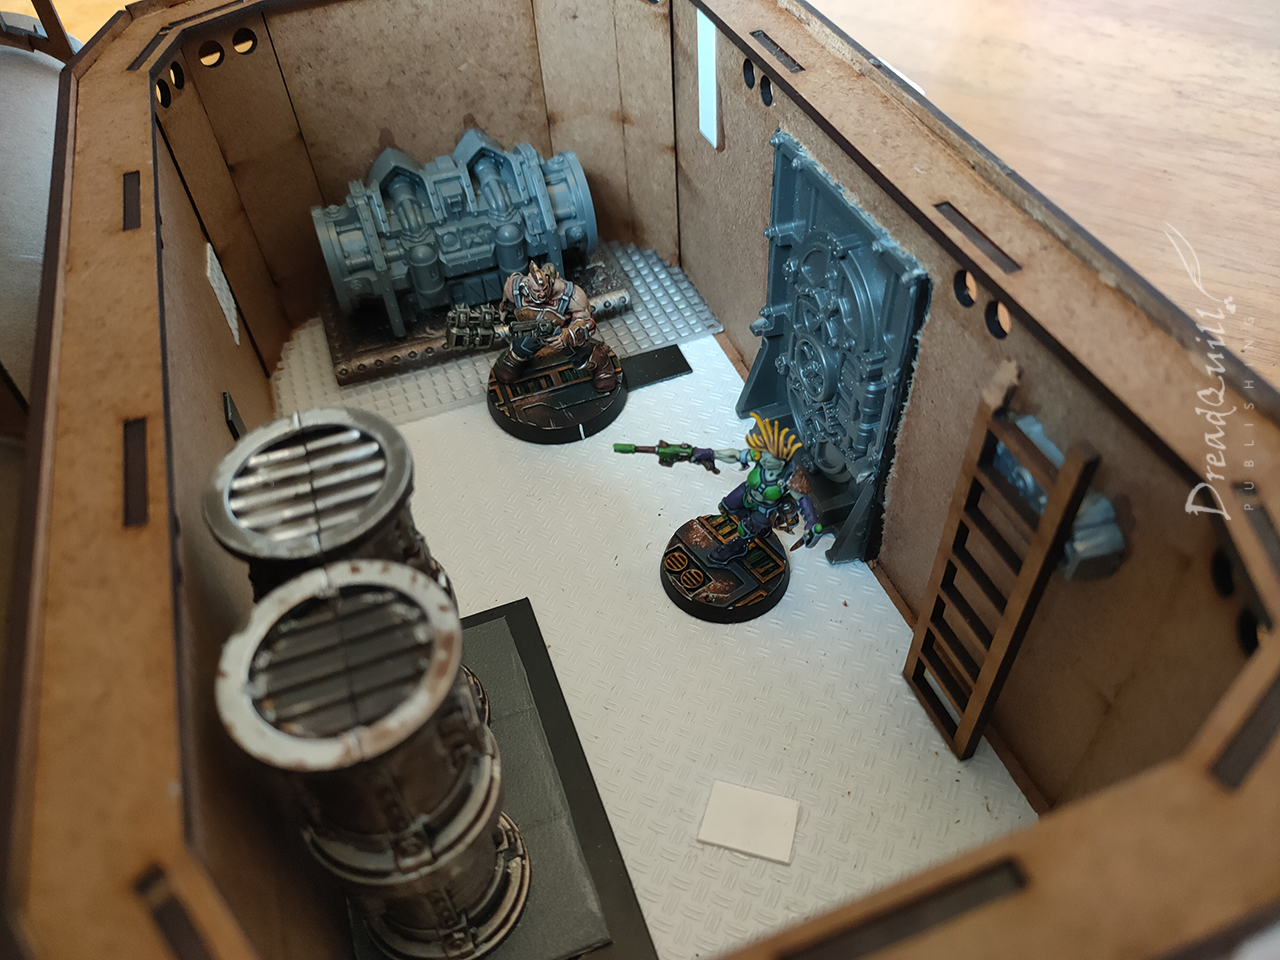
A few bits of plasticard stuck around help break up the flat wall panels and I installed a ladder to the roof.
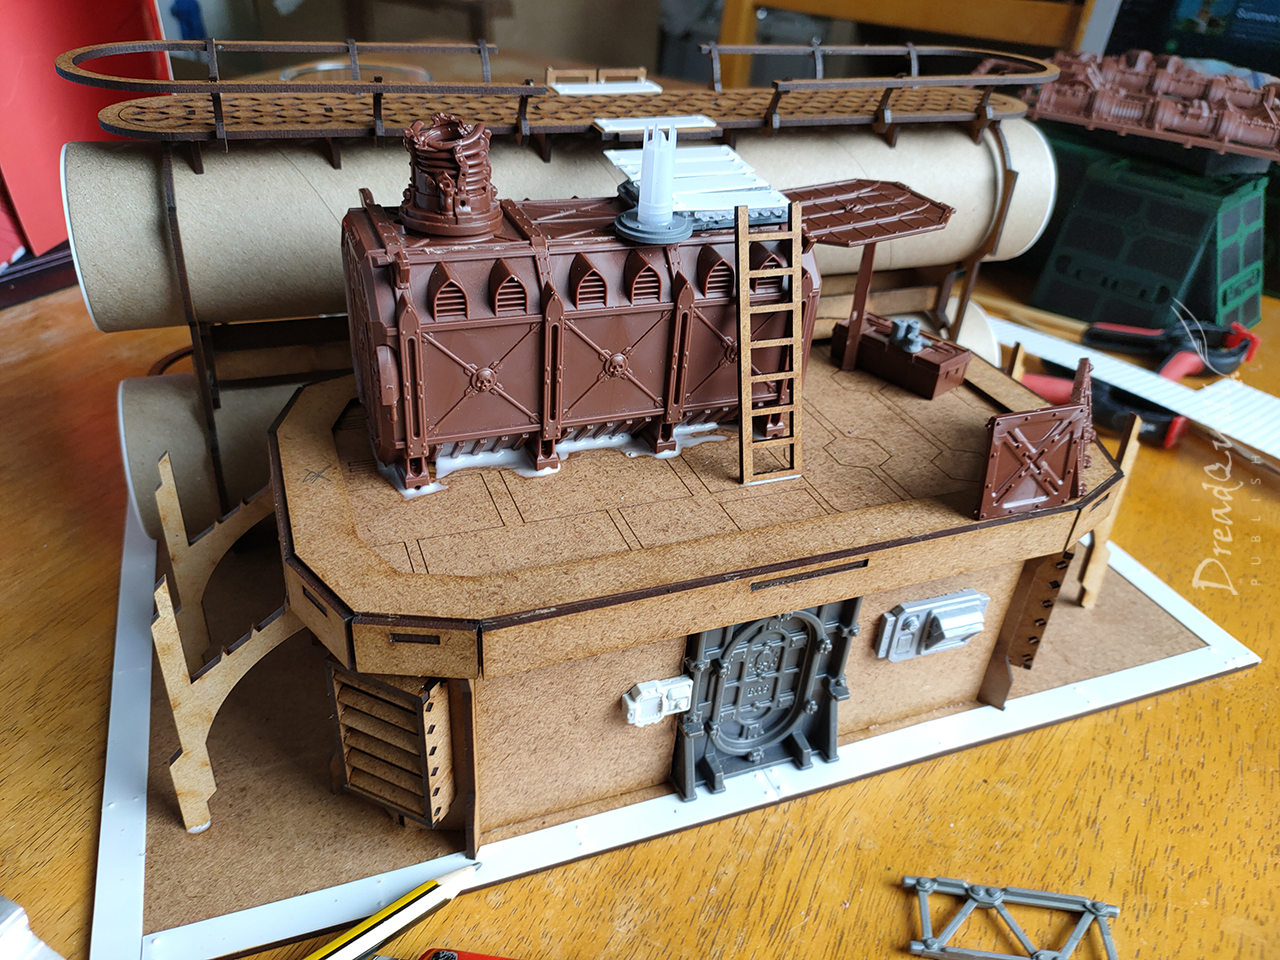
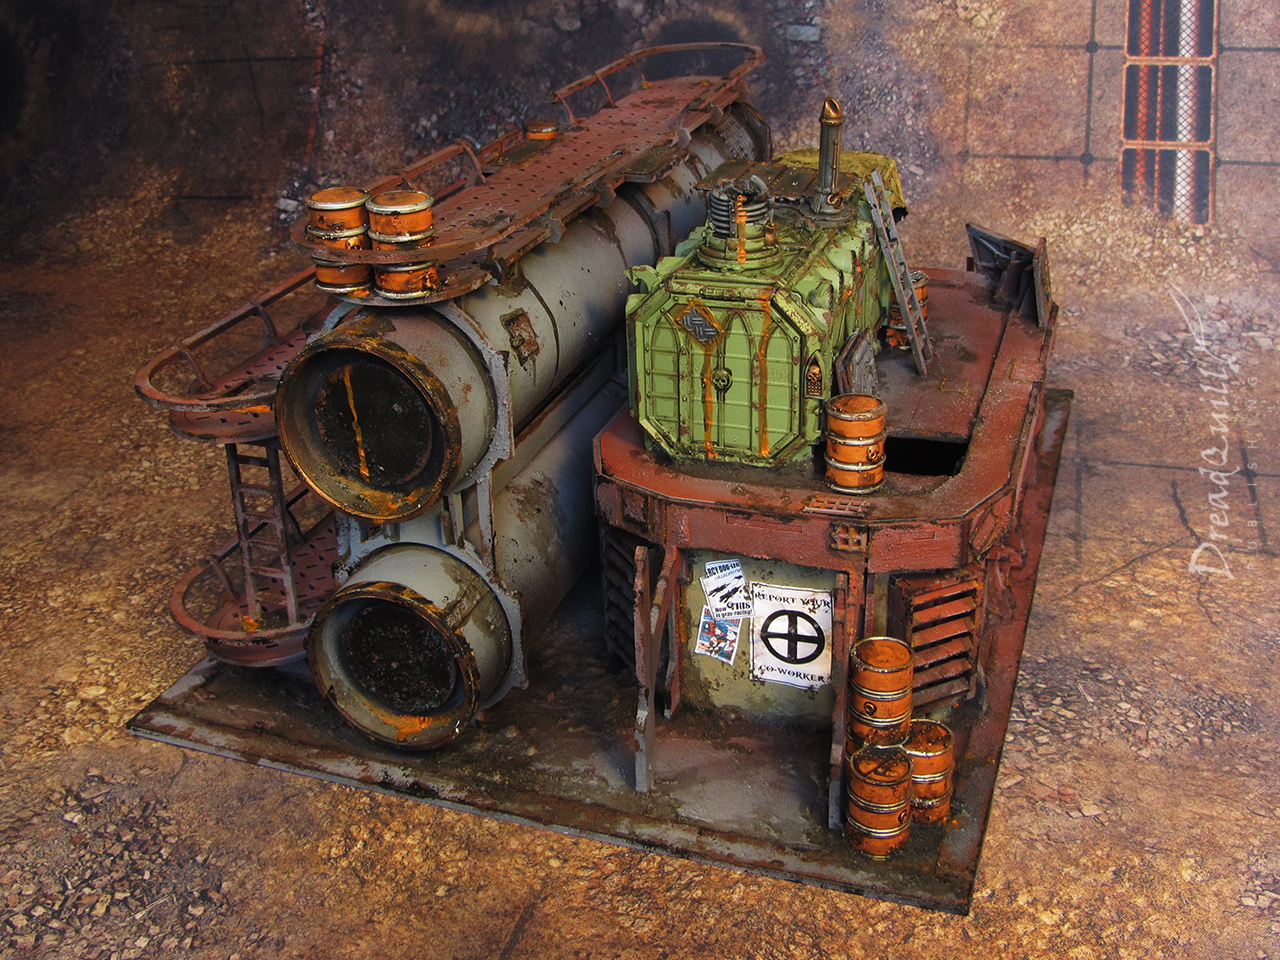
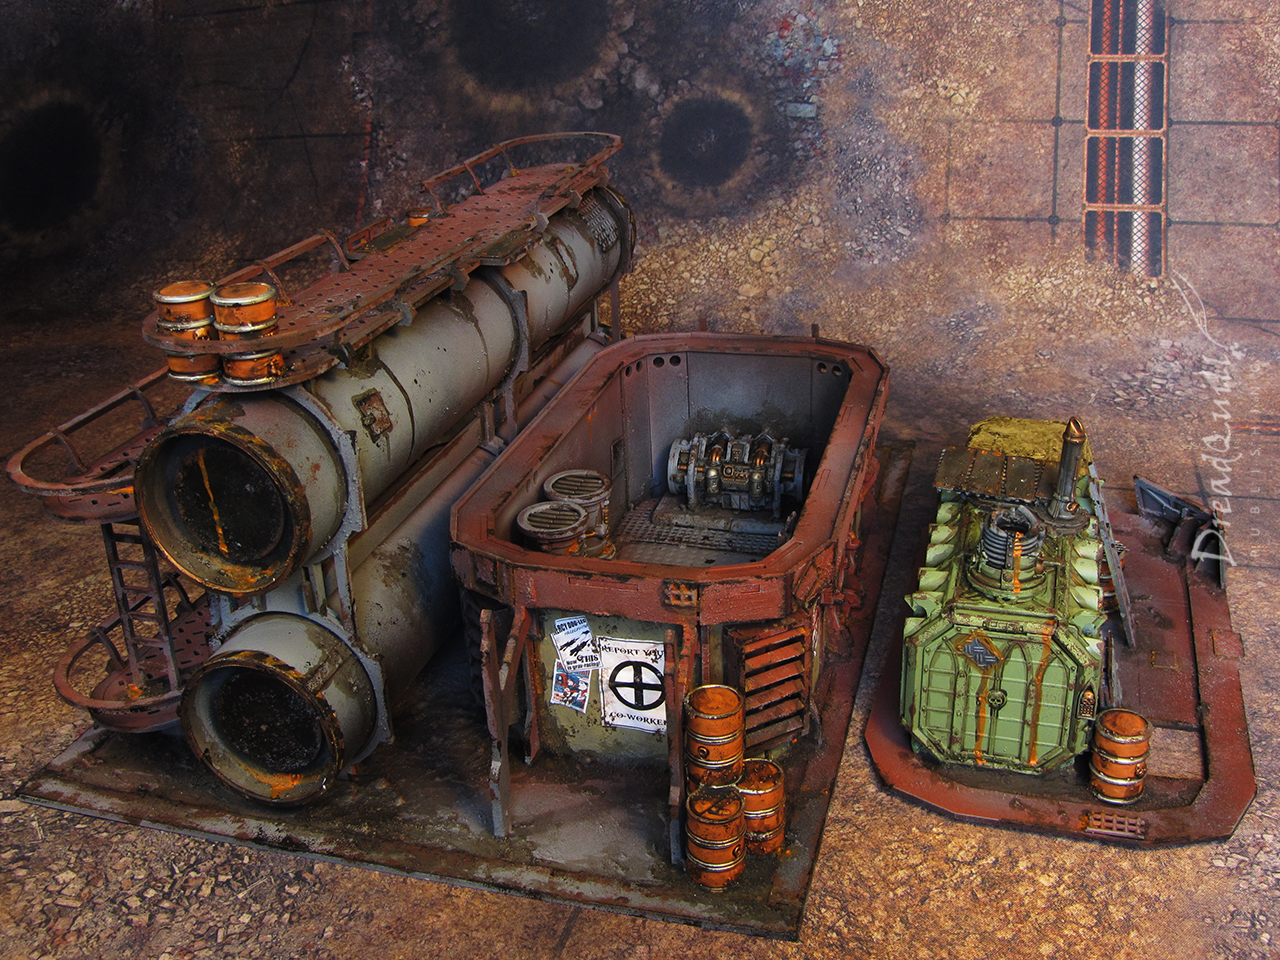
After a lot of deliberation, I decided the main draw for the terrain would be a hideout installed on the roof. I’ve been obsessed with people’s conversions of turning GW containers into living spaces and wanted to do one myself. I found the container was the perfect height to match with the top walkway on the silos, and an idea formed.
Penthouse suite
I added some gothic buttresses from my personal collection to help blend it with some of my other buildings and fill out the dead space on the baseboard.
I’m generally not a fan of scenery on bases unless the base can help tell the story, so I planned to fill it with spare barrels and pipes to provide more cover and allude to what the site was once used for.
I built a little shack on the roof, furnished it with odds and ends from the bits box to make it look more lived in. I’ve mentioned playability of scenery before, and the key principle of that to me is flow – gameplay should be able to flow across the scenery.
Going with the flow
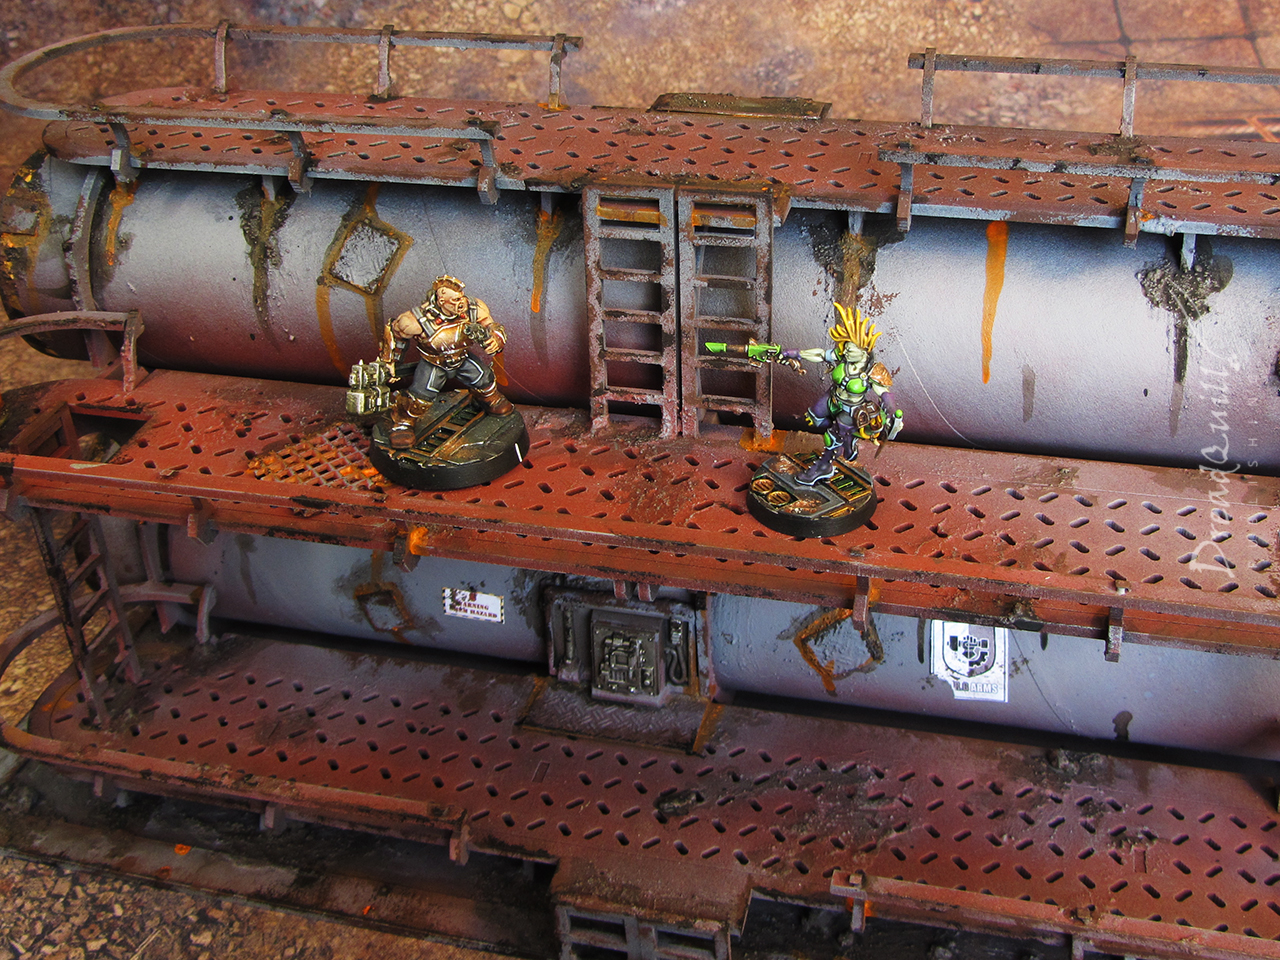
Height and cover are the mechanical benefits for using scenery in games like Necromunda, so you want to encourage players to seek out those benefits by making them enticing and interesting.
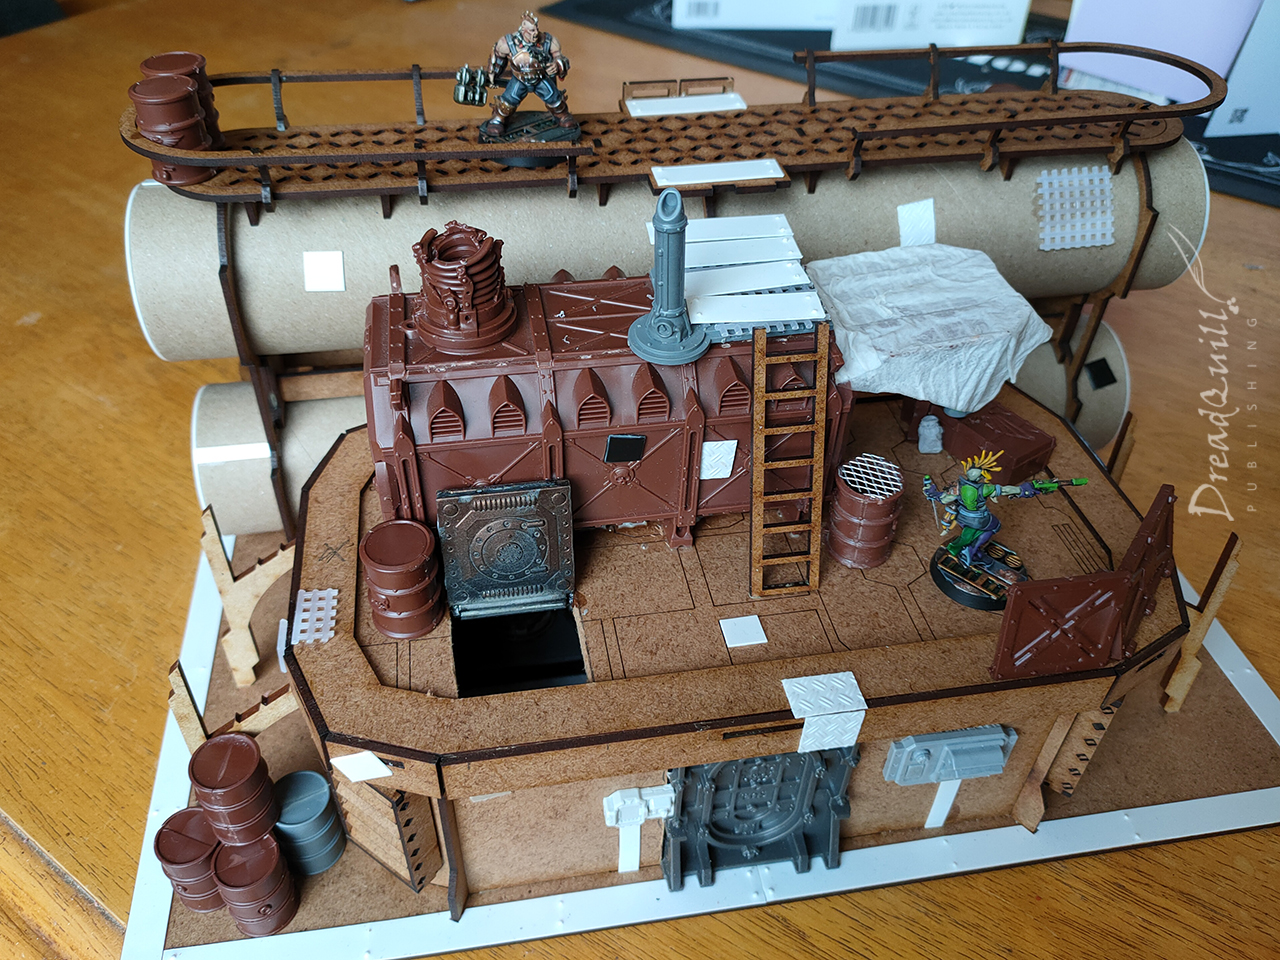
By building a walkway from the top of the container to the silos and adding a ladder to the roof, fighters can now traverse the entire structure without touching the ground. It would have been easier for me to stick a ladder on the outside of the building and call it a day, but that would relegate the building to a boring wooden box that serves only as a spacer for the diorama on top.
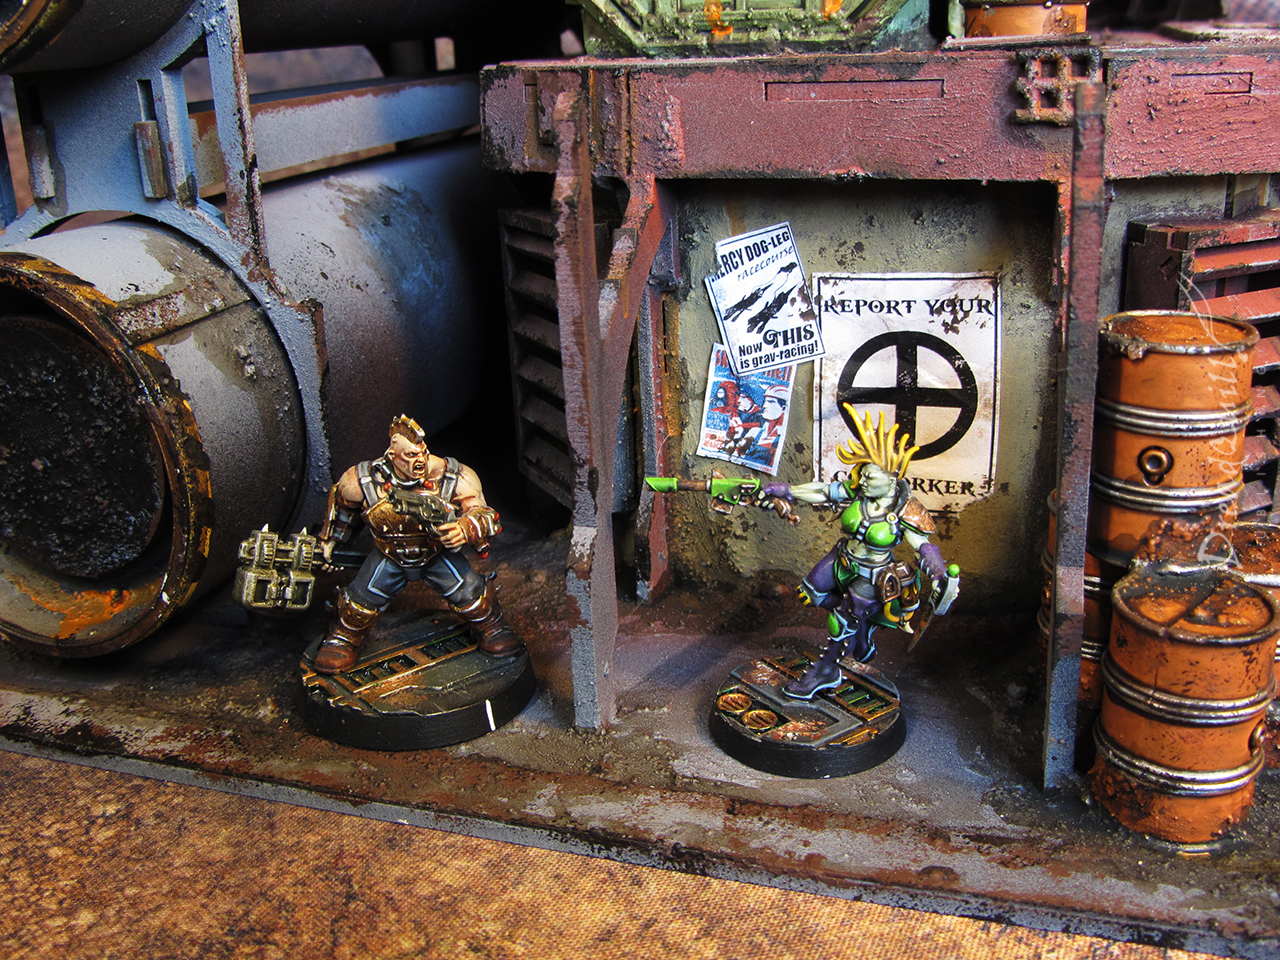
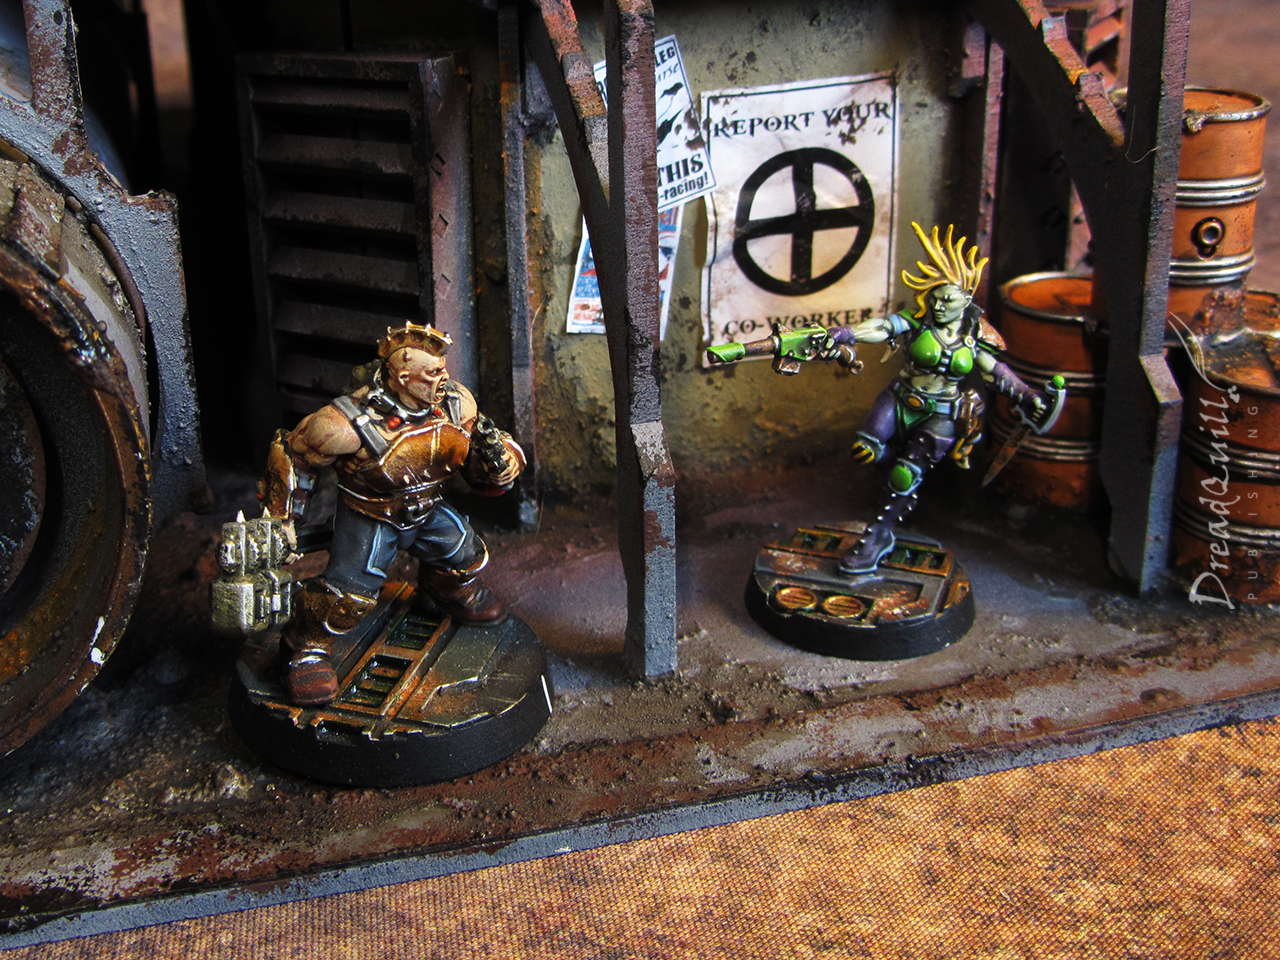
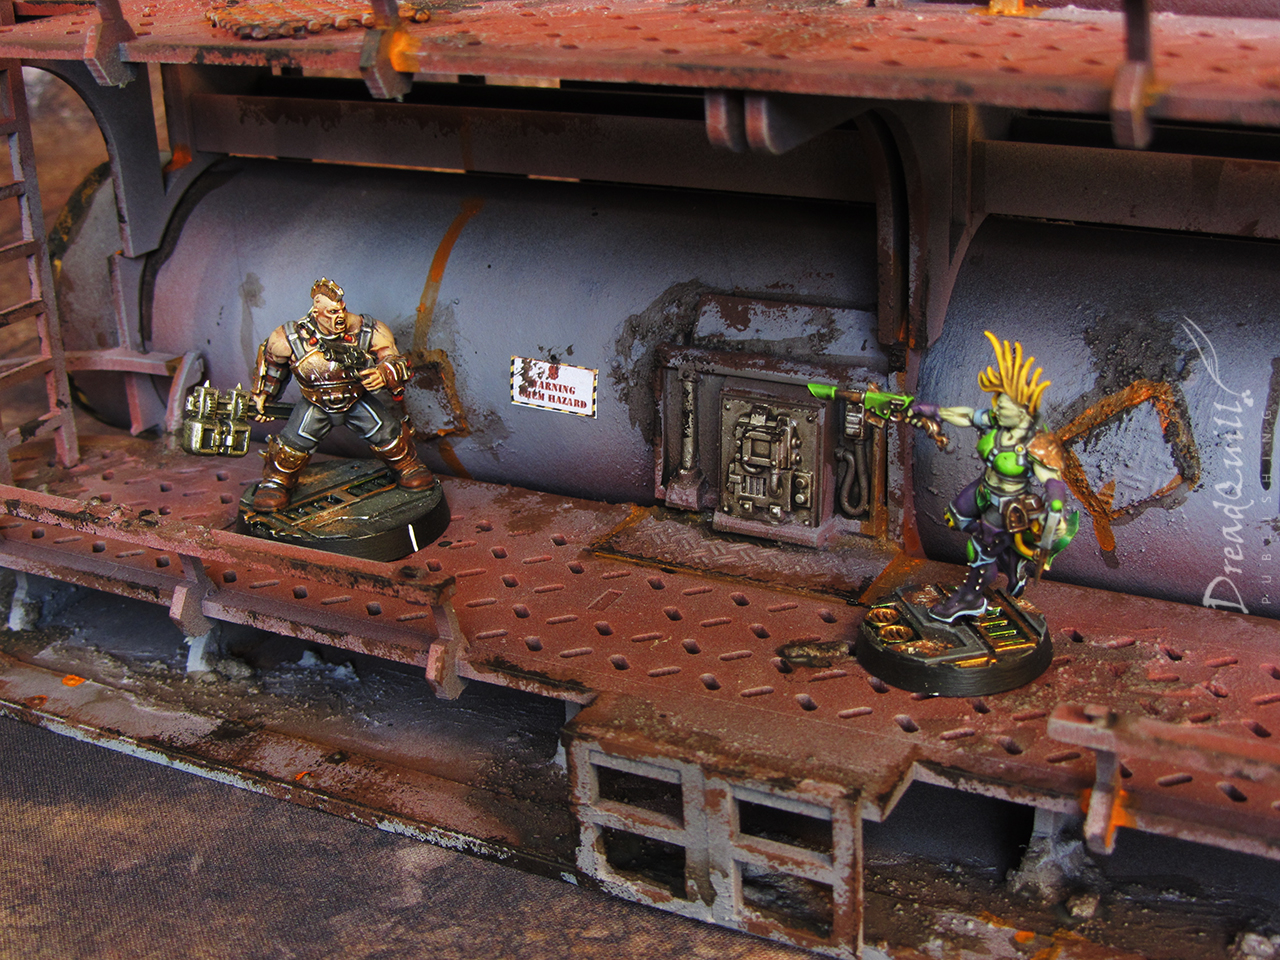
By building the ladder inside and adding a hatch on the roof, the fighters naturally have to enter the building to access the roof. This creates natural chokepoints and opportunities to use in-game mechanics – a rickety walkway, an open hatch, a lockable door. A ganger has sealed the hatch and is using the vantage point to pick off members of the rival gang – will they risk trying to unseal the hatch, or take the safer (but longer) route round the back to take her out?
Rather than just being a simple line-of-sight blocker, the flow of the scenery now creates interesting situations that sparks exciting narrative and (hopefully!) thrilling gameplay.
Finishing touches
Of course, no scenery piece is complete without lots of little details to make it feel lived in -some chimneys, an oil drum bbq, a sack, some candles on a crate, a mattress in the container. Some pieces are there to form cover, while others are just there for worldbuilding.
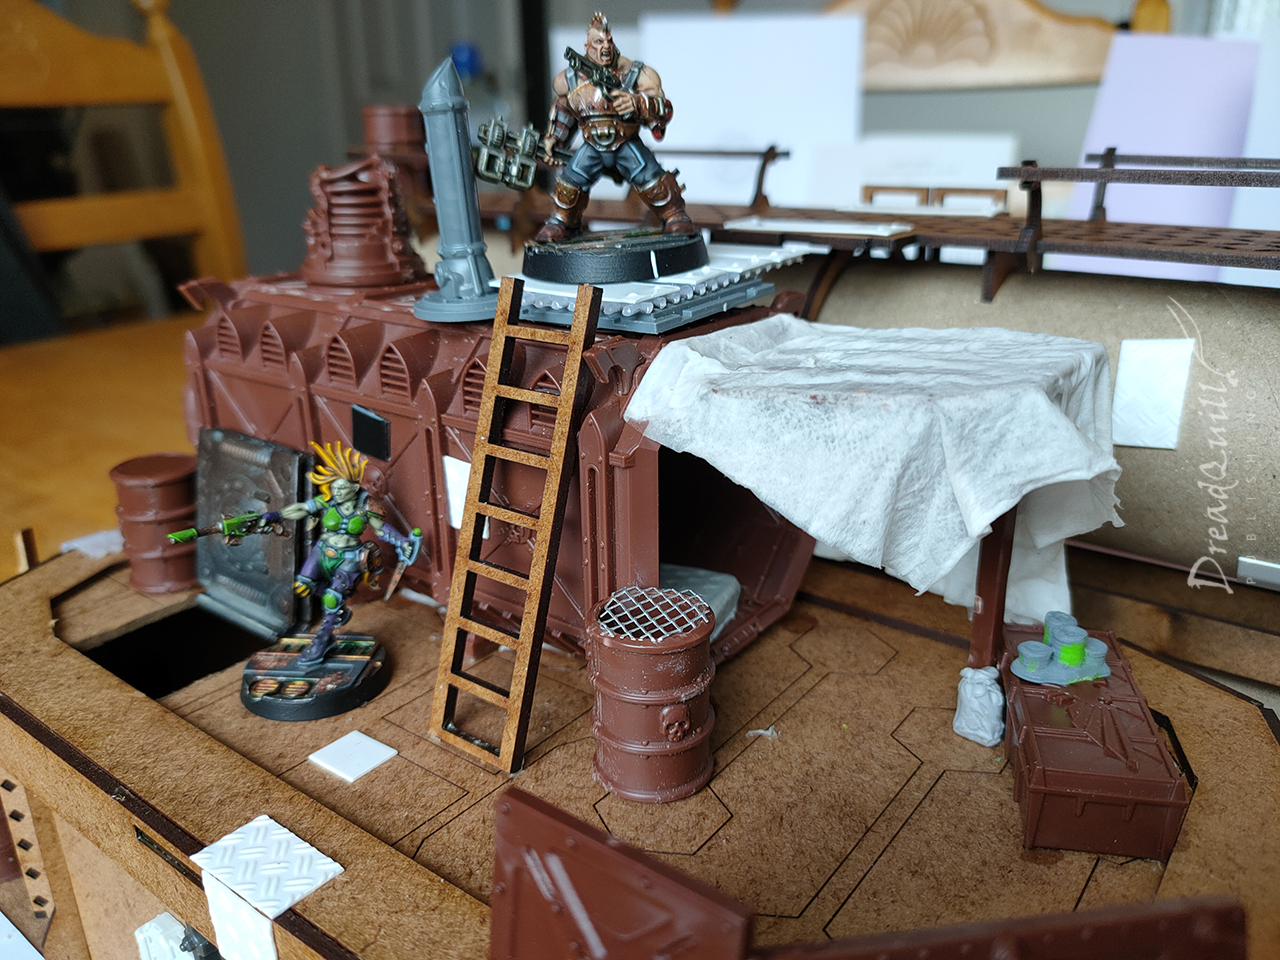
A piece of tissue paper soaked in watered-down layers of PVA formed the tarp over the propped-open container door, a neat little visual short-hand for “someone probably lives here”.
Small squares of plasticard were stuck haphazardly about to simlulate repairs or access panels and helps break up large flat areas when painting.
Once it was dry, everything got a liberal dousing with my Secret Scenery Sauce. This is just an extremely low budget textured paint, consisting of PVA glue, ready-made all-purpose filler, a small dollop of black paint, and mixed modelling sand. I tend to shake off my cutting mat into my modelling sand after building things to help vary the size and texture of the particles too. Waste not!

Painting the silo
The entire piece was undercoated in matt black, with a zenithal grey spray highlight. Key areas were picked out in a rusty red colour (also rattlecan), such as roofs and walkways. I was working on some other silo projects alongside this, so I sprayed them all up at once.
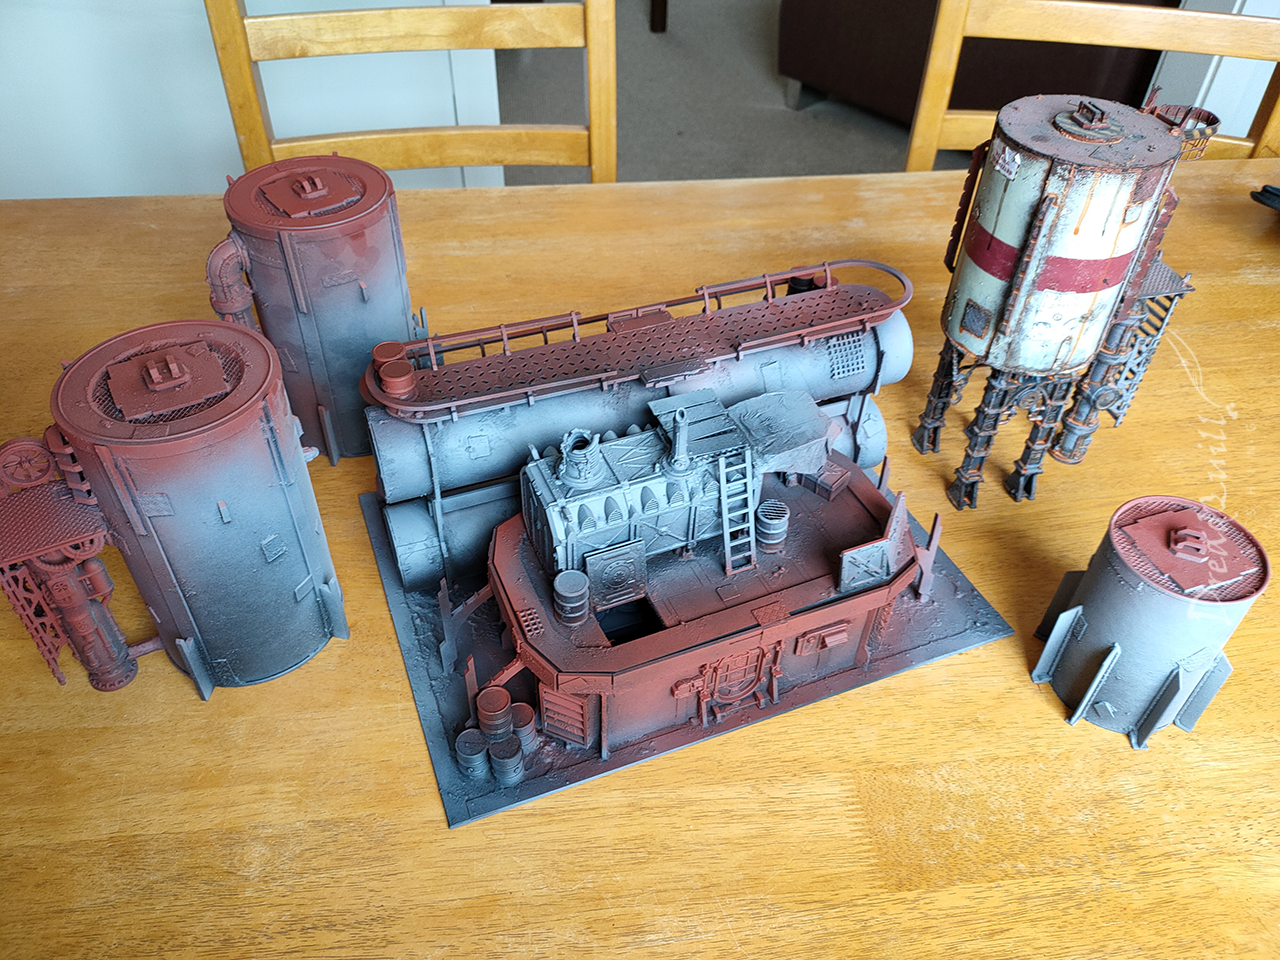
It never ceases to amaze me how much a piece comes together ocne you’ve undercoated it. Painting it was straightforward, as I already had a recipe from the Mercy scenery I finished last year (but have not got round to photographing because I’m a monster).
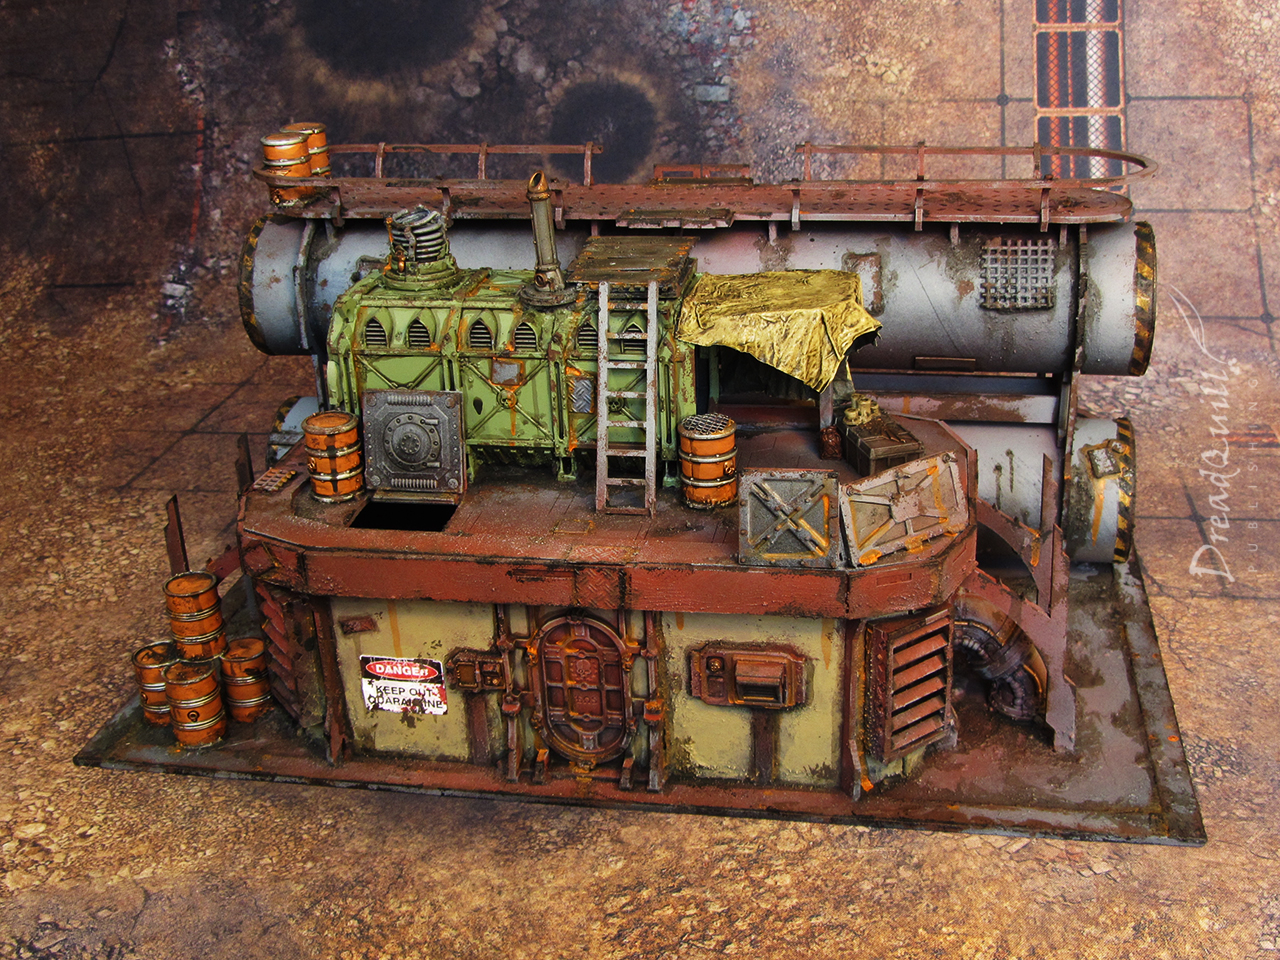
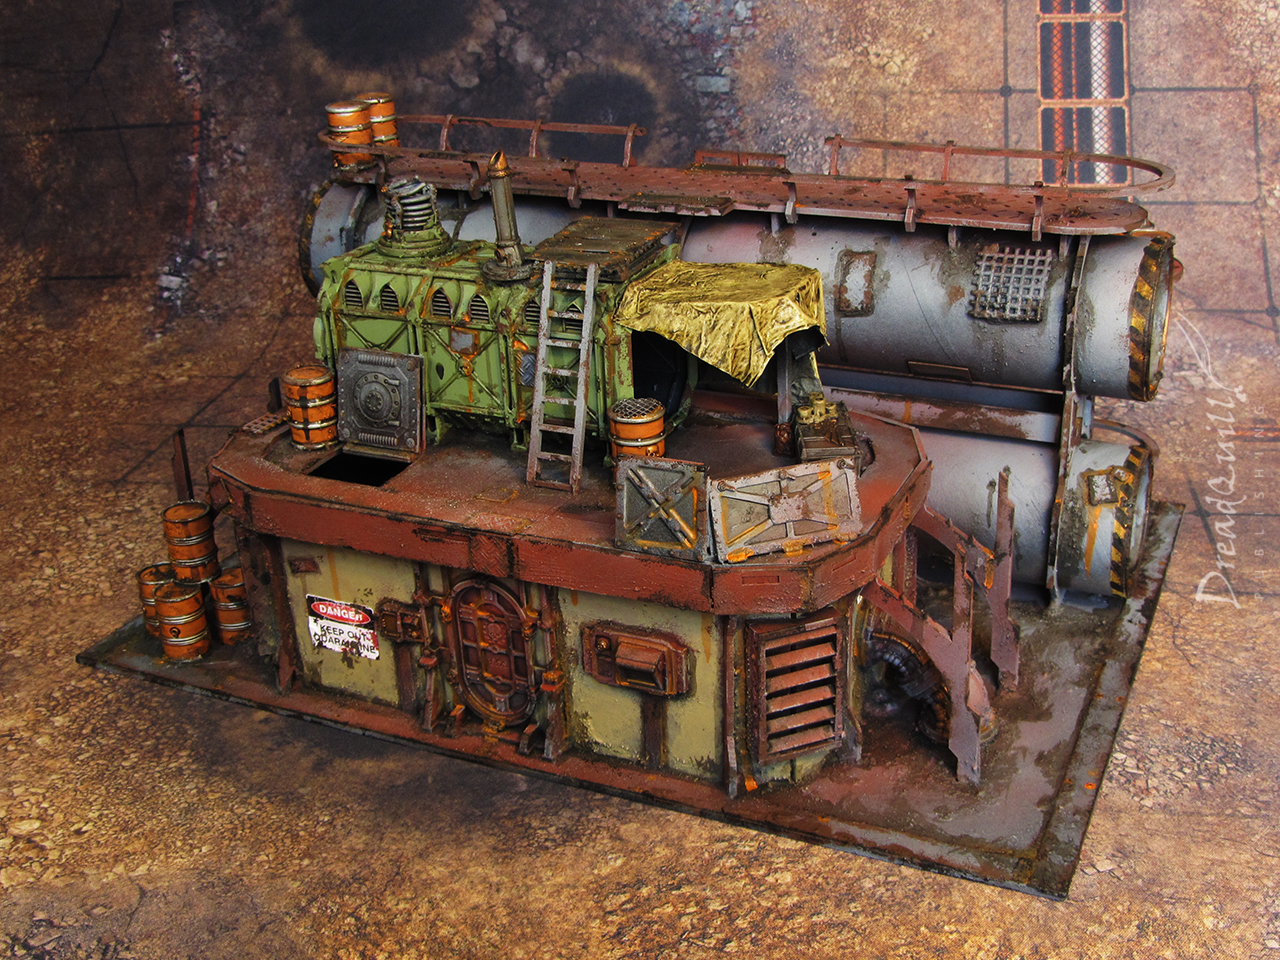
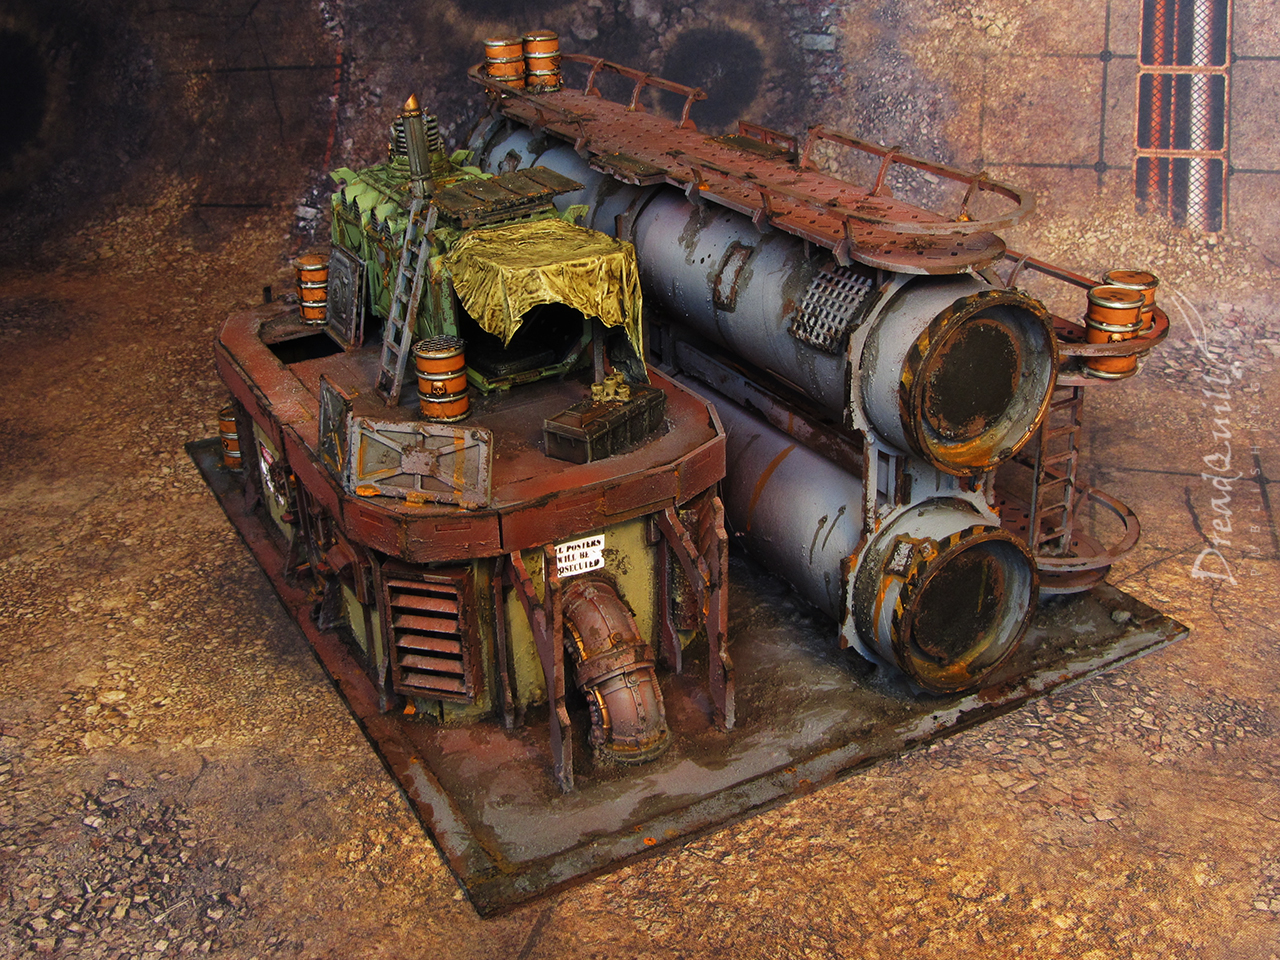
Final photos
- Drybrush all raised edges with Dawnstone/light grey.
2. Tear off a little bit of sponge (rougher edges work better, I find) and sponge on some light brown around the edges of metal sections to emulate paint chipping. Concentrate it around areas most likely to be touched or roughed up. I use a pair of tweezers and a little cube of sponge about a half-inch thick, but I’ll use a bigger bit for larger scenery pieces. Repeat with a darker brown around concentrated areas to look like deeper chipping.
3. Paint blocks of colour – orange and silver for barrels, bone colour for the tarp, grey-green for the container, pale green for the wall panels, some yellow/black hazard stripes around key areas.
4. Liberal application of Agrax Earthshade, usually splashed into recesses and corners to create depth/dirt, but some bits get completely covered (like metals, boxes or tarps). The barrels got a wash with Nuln Oil, and the tarp got a second wash with Athonian Camoshade.
5. Once that’s dry, I get a mix of very watered down orange and apply rusty streaks where water from above would naturally pool. I used to do multiple extremely thin layers of orange, but who has the time for that?
6. Decals! I have a collection of little posters I’ve acquired from across the internet (usually by googling 40k posters) and made a few myself related to our own games, which will get a blog post of their own at some point no doubt.
I download them and print them out on regular paper. Once they’re cut out, I tear off a corner or two, scrunch them up real good, then paint some PVA onto the reverse and attach them roughly to the intended surface. The trick is not to make it look too neat – they look best when they’re folded over on themselves, slightly peeling away from the wall, and overlapping each other.
7. The final touch is some good ol’ Typhus Corrosion. This is usually applied with a big stiff paintbrush, and either flicked or stippled on to surfaces that are still too flat or boring. Typically posters get a little attention to help blend them in with their background.

And that’s it! It can take a few evenings of labour to get them finished, but having the recipe in place makes it easy to paint large batches of scenery without too much thought. I’ll be inevitably acquiring an airbrush in the near future to help me deal with some other bits of scenery, so it’ll be interesting to see how much this recipe changes once I’ve got the hang of my new toy.
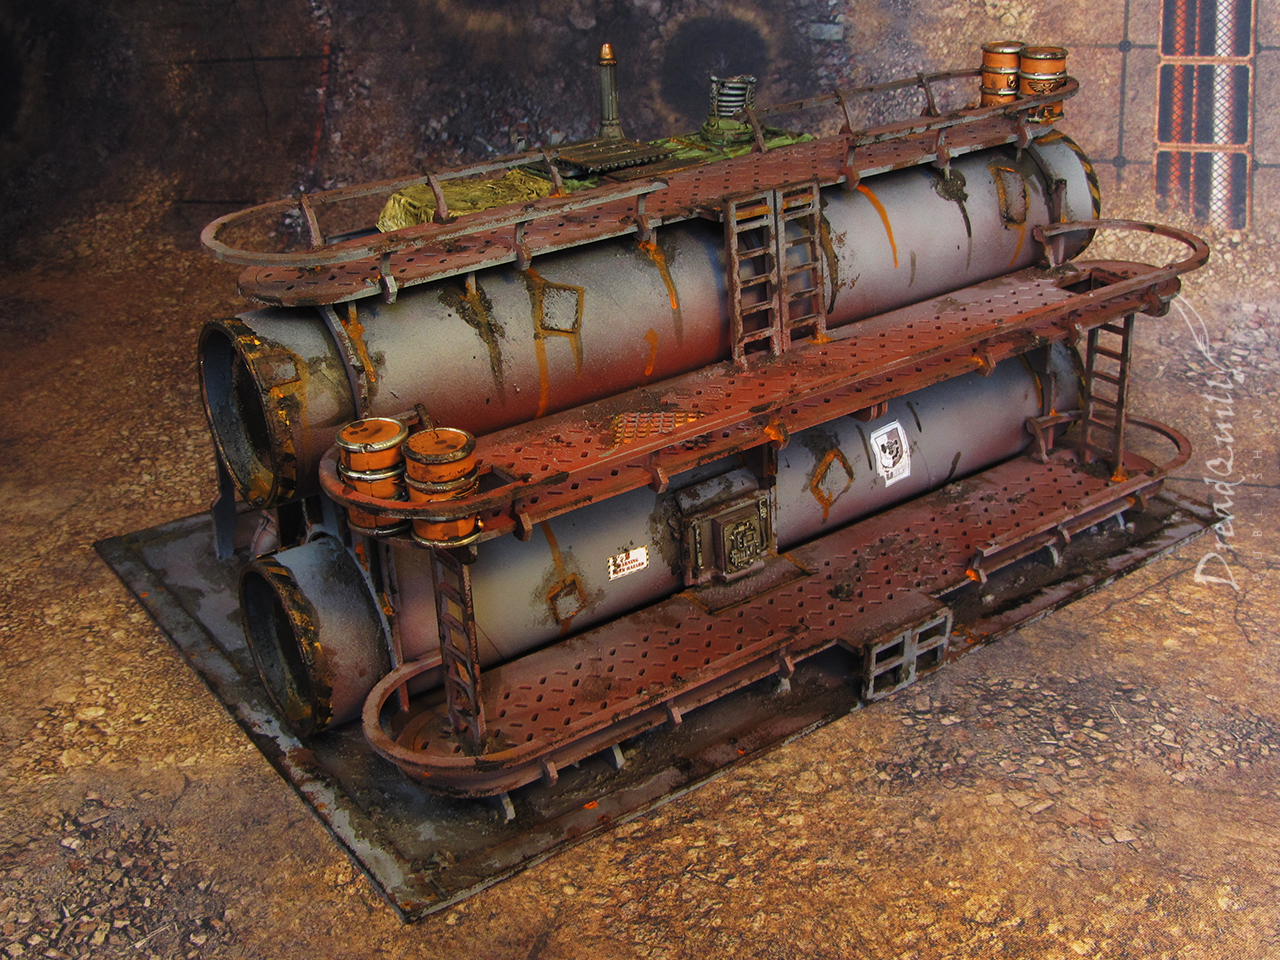
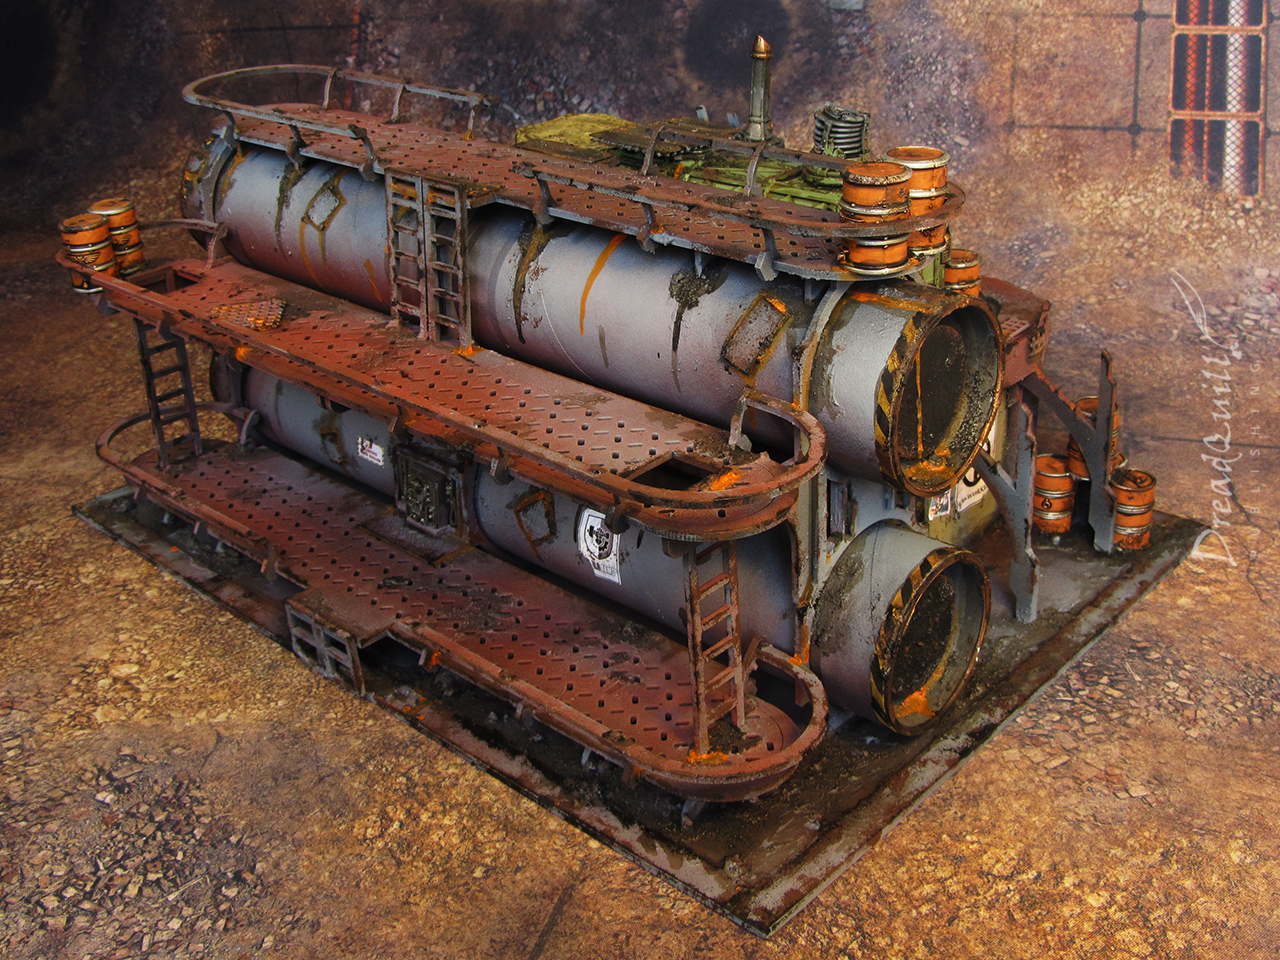
Glamour shots
You’ve read enough words by now, time to roll out the pictures. Enjoy!


Two thumbs up
Overall, the Chemical Silo kit was a delight to work with. It comes with enough detail that you cansplash a few colours across it and use as-is, or you can fill in some of the gaps with other bits of scenery from your bits box to blend it in with your collection. There are loads of other kits with similar designs so you could easily fill a board with various factory pieces, silos, conveyor belts, etc.
If you haven’t checked them out yet, go buy some stuff from Wargame Model Mods. They’re a small company with a huge range of stuff (battery-powered mechanised scenery anyone?) and could absolutely use your Imperial Credits over some of the larger companies.
I had a blast working on this, and it sparked enough creativity that I wanted to see the project through as quickly as possible. I’m really looking forward to playing with it now!