

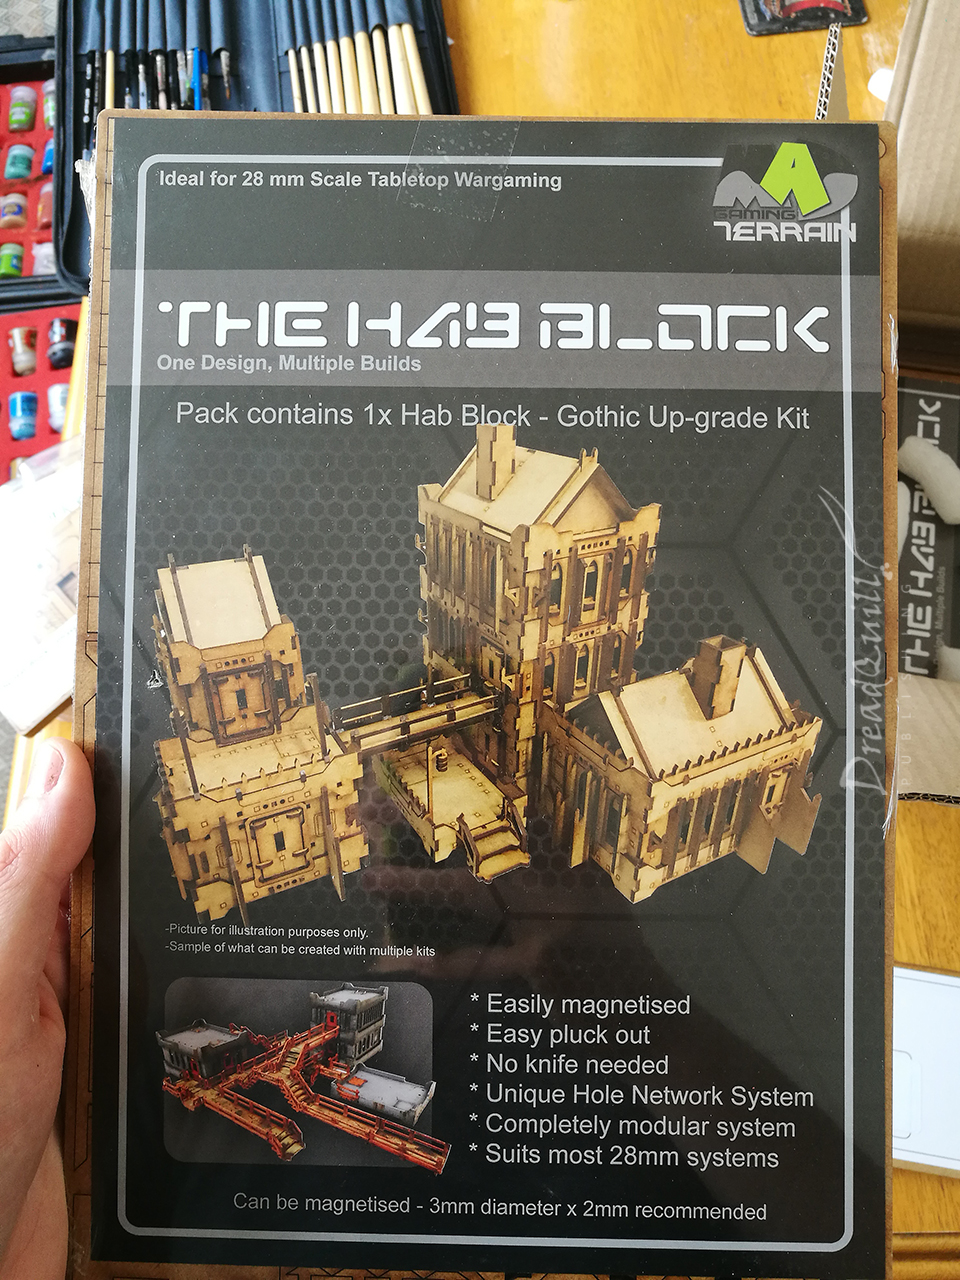
A long time ago I found myself with a HMRC-related windfall which coincided with the release of a neat-looking kickstarter for a modular mdf terrain system. I was very taken with it, especially with the Gothic Upgrade pack making it look like the creepy hive city hab block from my dreams. I dropped some cash on the project and forgot about it for a year.
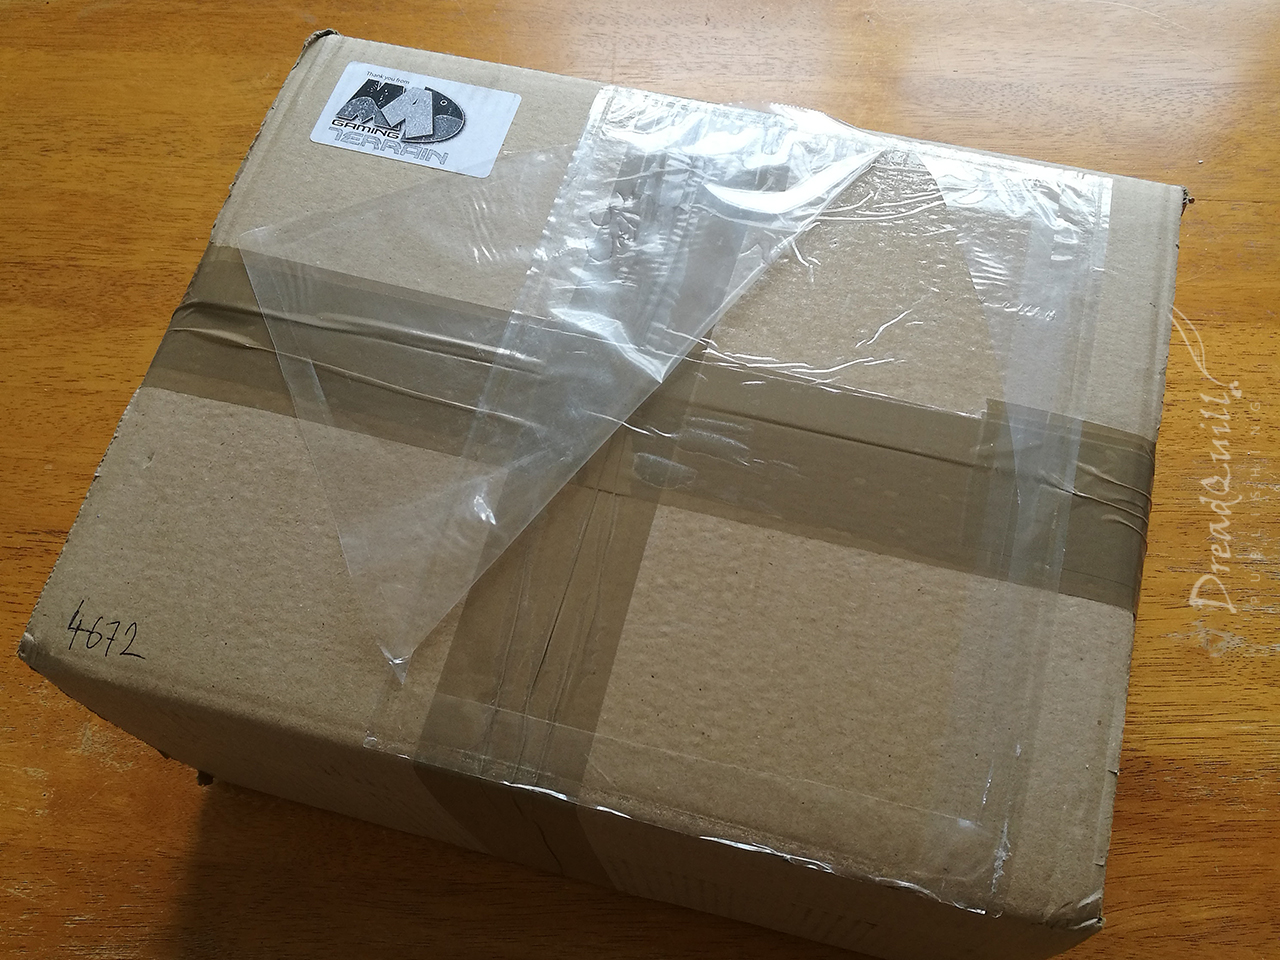
Fast forward past a house move and some postage misadventures and this (very) heavy box was sitting on my proverbial bench.
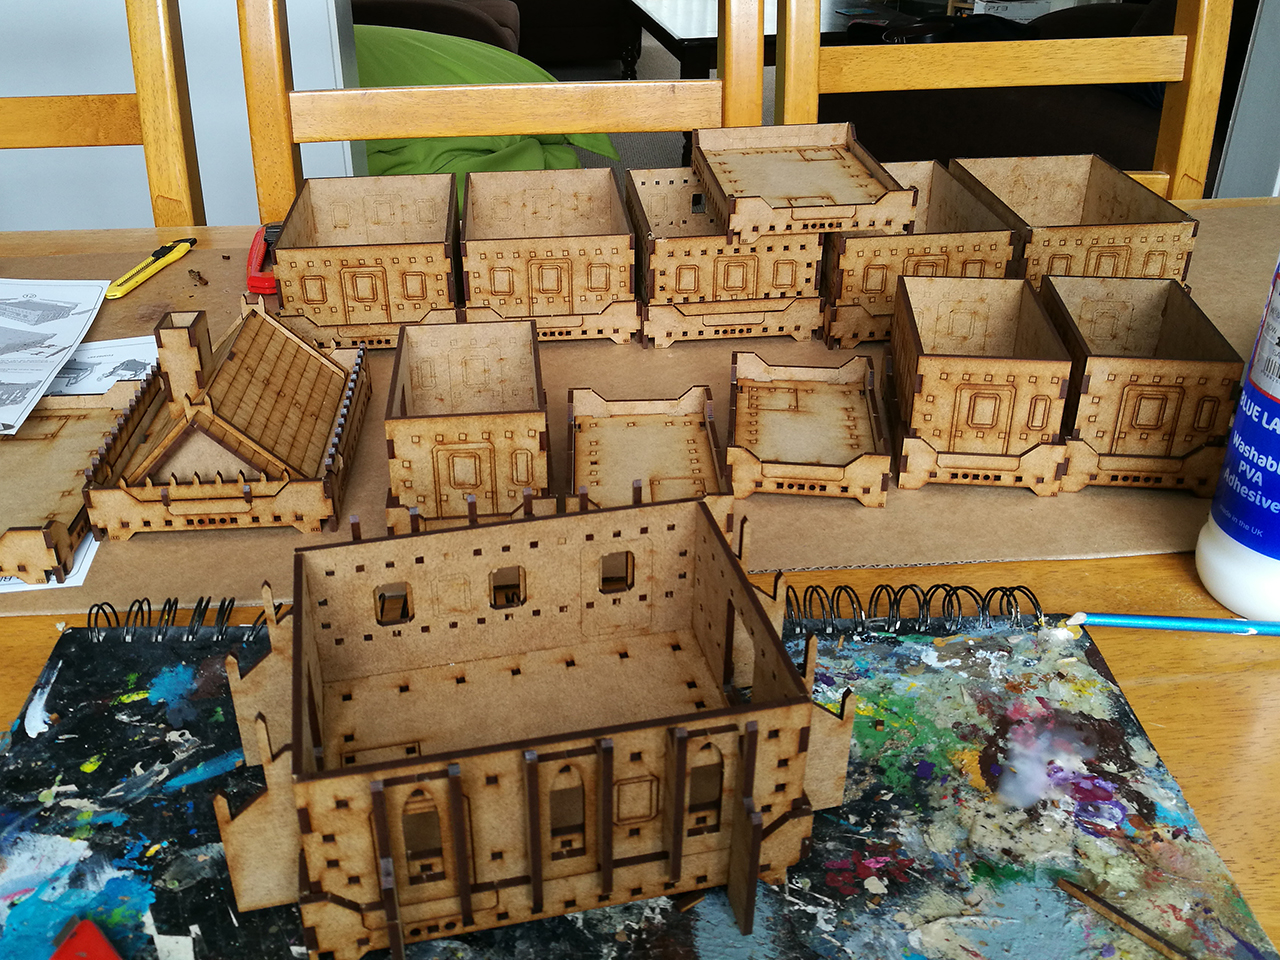
Unpack the block
I don’t know why it surprises me how much mdf weighs whenever it arrives. I had a hundred and one other things that needed to be done that day, so I of course cancelled all my plans and tore into the package.
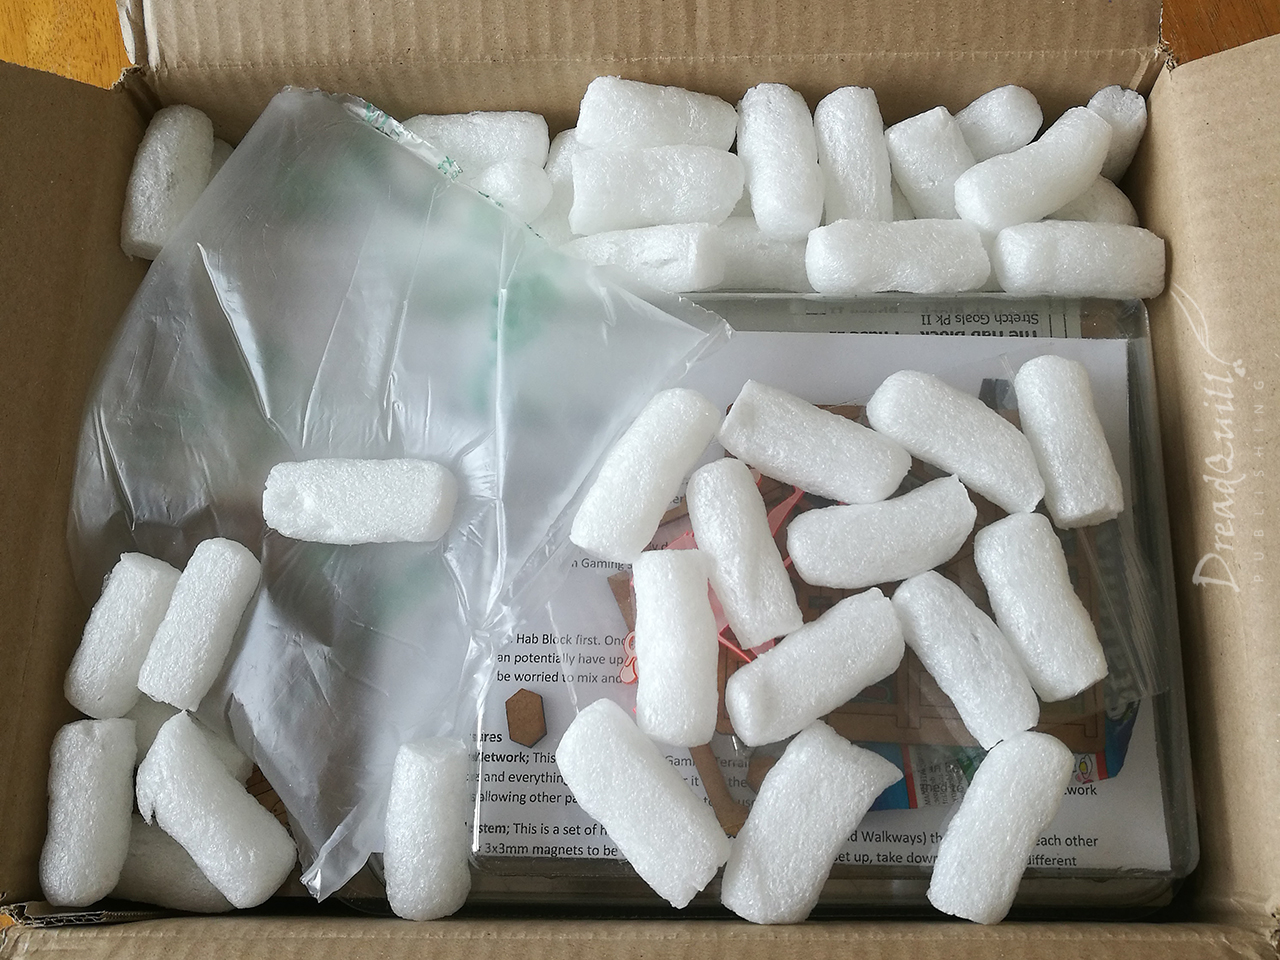
Lovely packaging, barely an inch of wasted space. It began to dawn on me how much assembling I was going to have to do.
an inelegant start
I can’t talk about the kit without mentioning the elephant in the room when it comes to MAD gaming – there were a lot of problems with the Kickstarter. They raised money in orders of magnitude greater than they (apparently) planned for, which caused massive backlogs of production. Their expected delivery time went up from one month to another month, to next month, to the month after…
I stopped following after the first few months – there was only so many times I could read “Hey so we’re delayed again because of [some other reason] sorry backers” before I got bored of checking in. They were on Pledge level 2 after the first few months, I was waiting for Pledge 6.
There were some issues with postage and an ill-conceived attempt to plug the next Kickstarter before they’d finished delivering on their already super-late current Kickstarter. If the product wasn’t great, I’d find it difficult to recommend MAD Gaming Terrain.
As it stands though, the product is well-made and extremely well engineered. I found myself genuinely daunted at the prospect of assembling it from the sheer volume of options available. As of right now, most of this stuff is also available to purchase from their local supplier too, and depending on how this assembly goes I may well be picking more up in the future.
If regular online shopping goes well, I will be back to recommend them whole-heartedly!
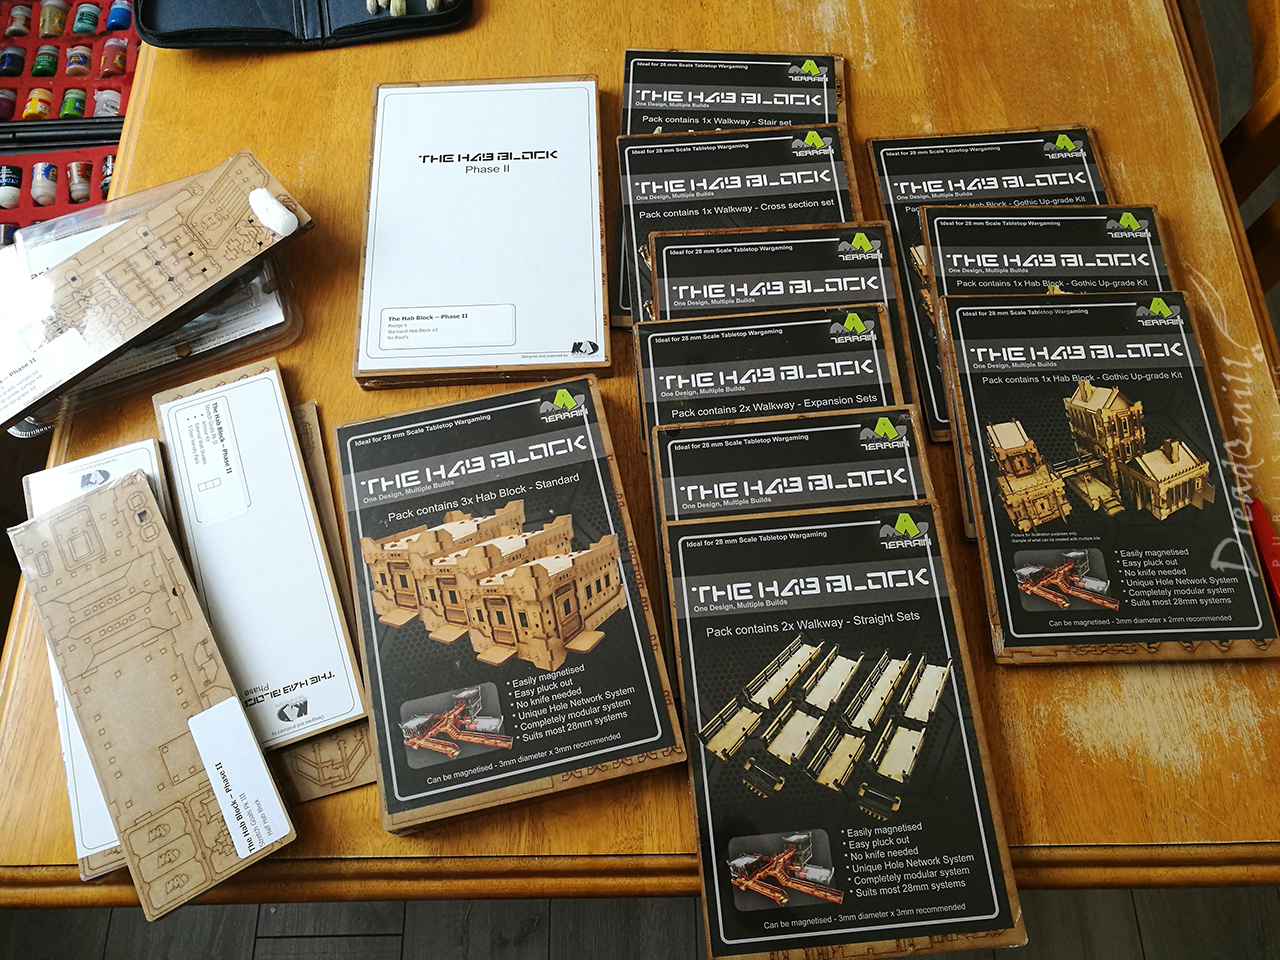
So many parts
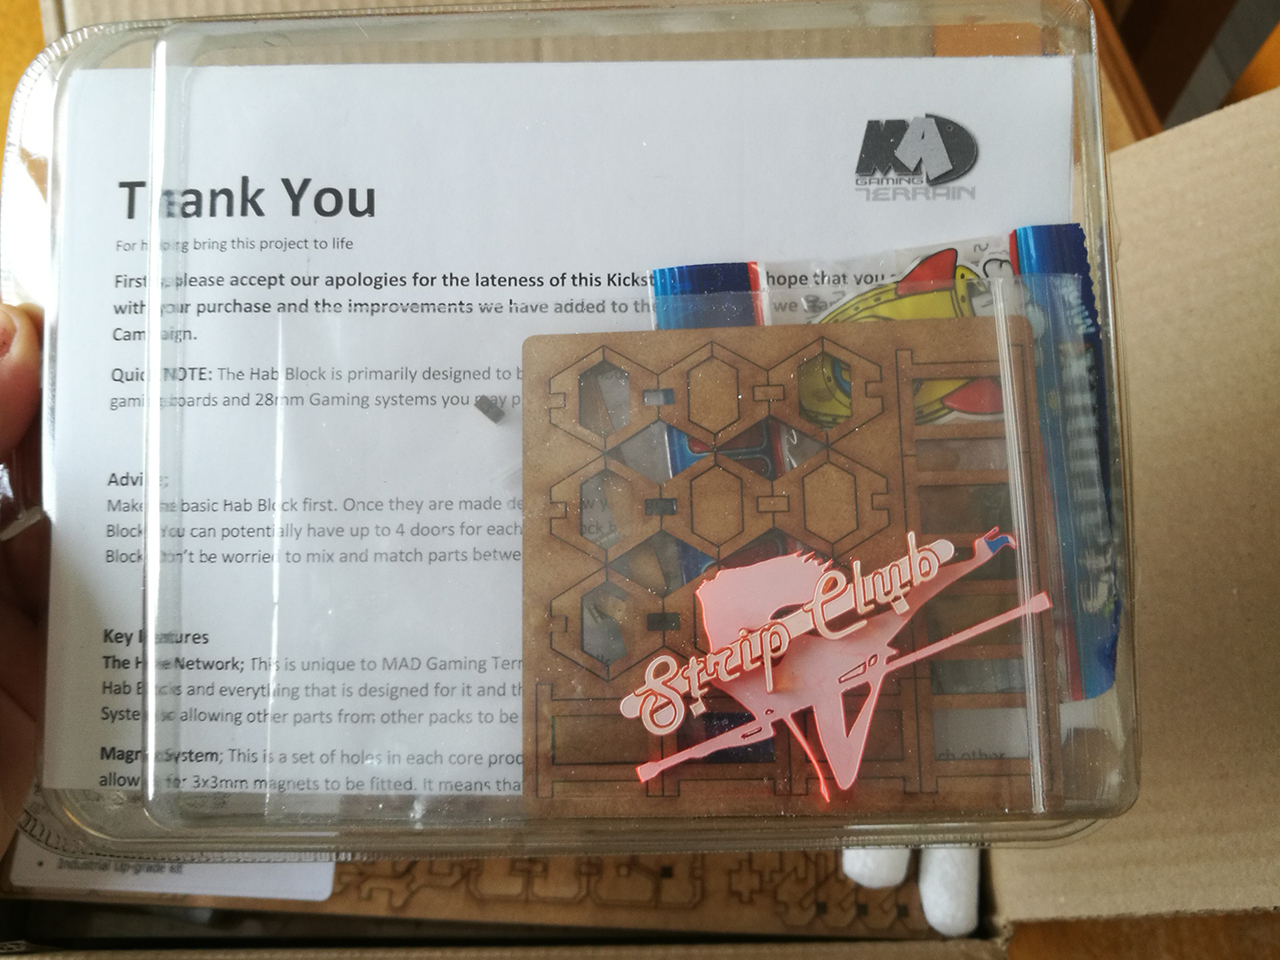
There were a lot of sprues, many of which I couldn’t work out the utility of. The assembly instructions were very useful, but when it came to optional parts the rules were “Go nuts” or “Check out our videos on Youtube for ideas”.

I am loathe to watch construction videos – I don’t like scrolling through a 15 minute video of people talking about their product to get a grainy 480p flyby of the thing I’m looking for. Give me a big picture to pore over or give me death.
I began to unpack in earnest, trying to work out the best way to approach the project. After several hours I came to the conclusion that there was no best way – I was just going to chunk through random sprues and pray it worked out.
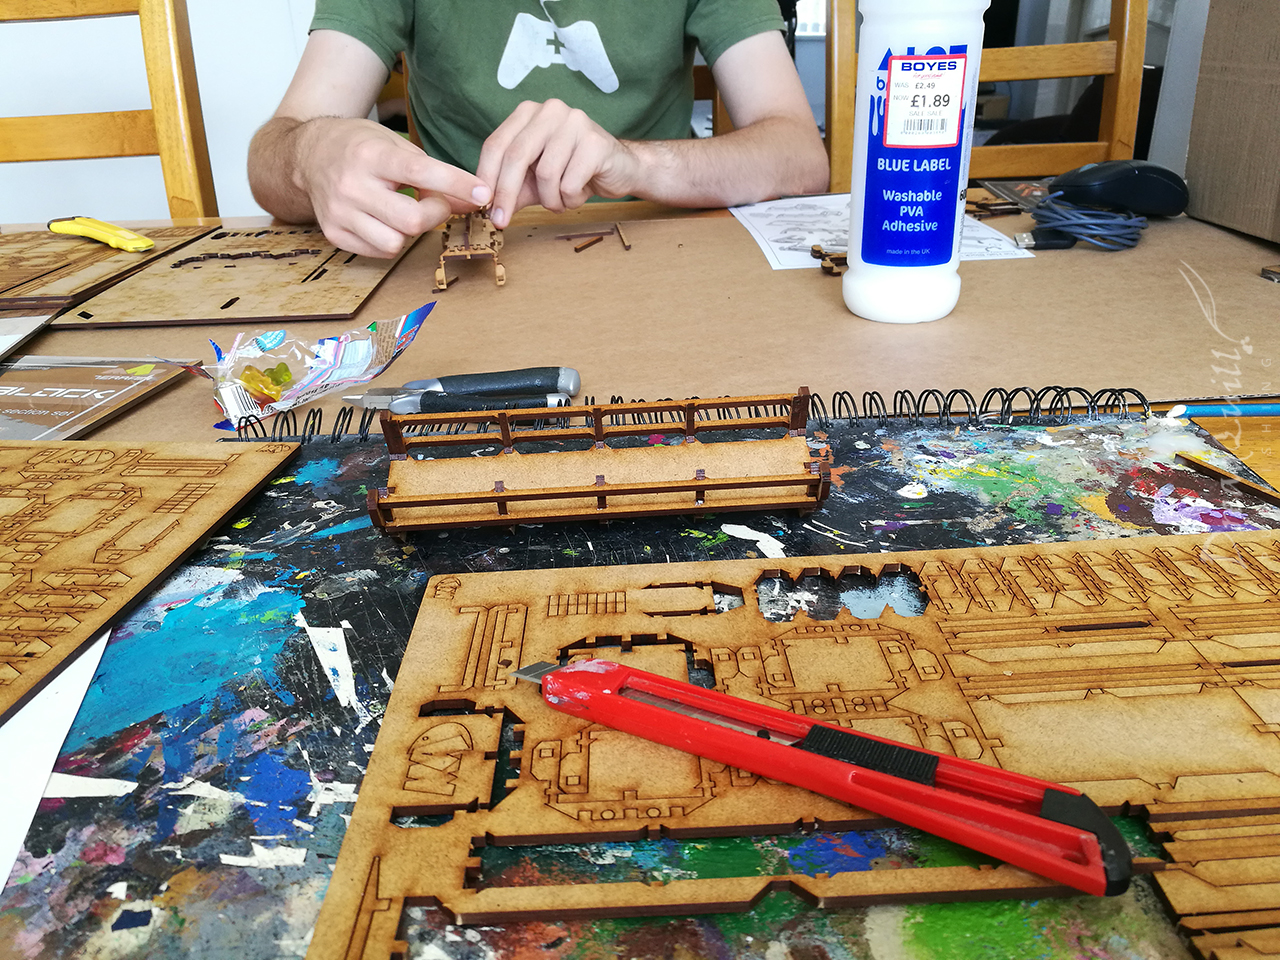
I picked things that had instructions – namely the base hab blocks and the walkways. It was all straight forward and well-documented – I had no issues following the base instructions that came with the kits.
In fact, the only problem I encountered was boredom after assembling my millionth walkway – which I only have myself to blame for trying to build everything in an afternoon (and for ordering so much damn wood).
Coming together
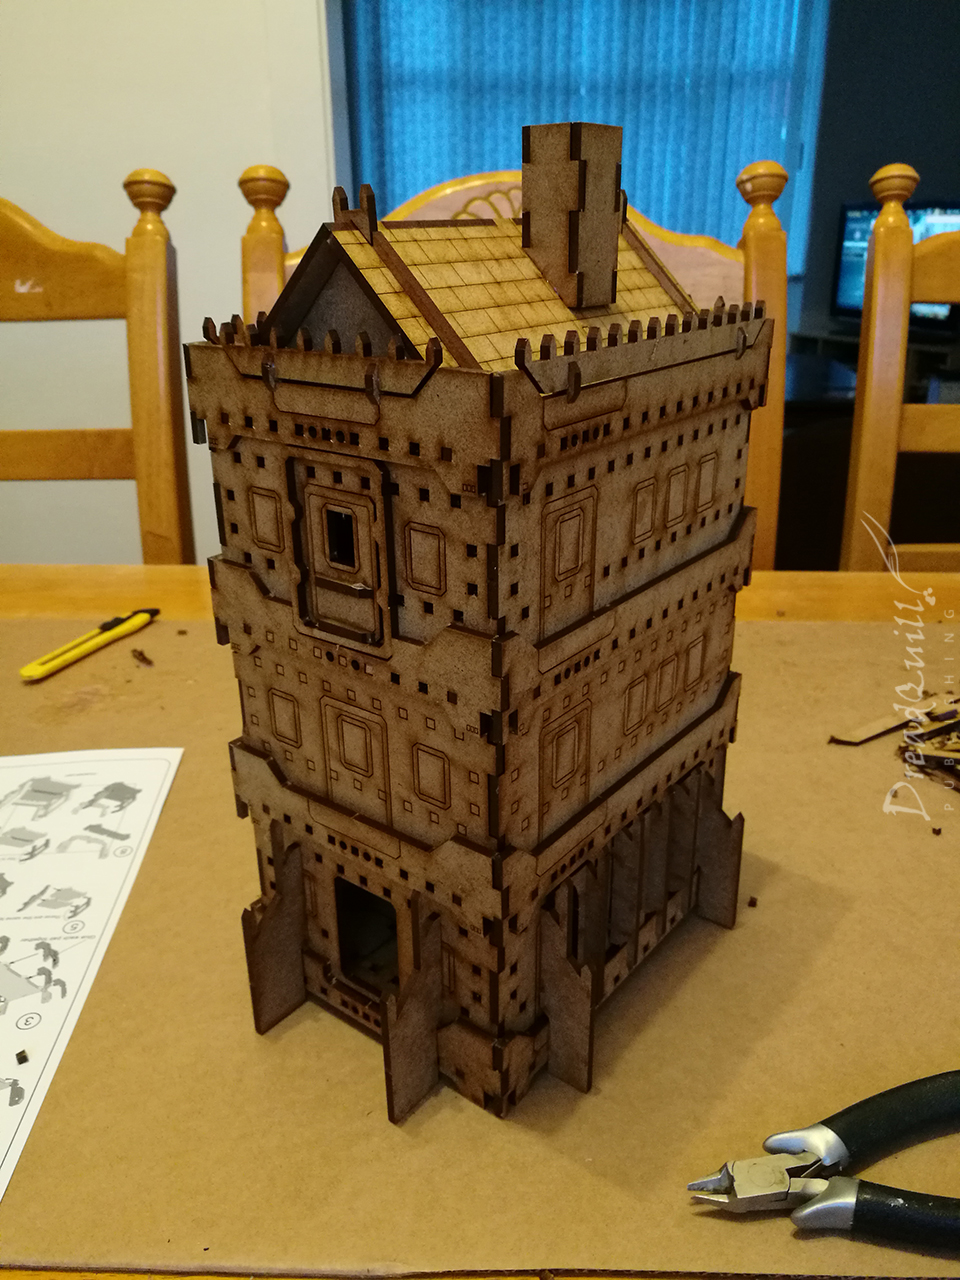
I love building complicated kits, and although they are a ballache or tedious (or both) to assemble, the finished article is very impressive. I’m a huge fan of kits that have enough detail on them that makes painting easier, as applying colour is something I find particularly difficult. These kits look like they’ll take a few rattlecans very nicely, and after they’ve been tickled with a drybrush and had a few details picked out, they’ll look amazing on the tabletop.

I also had an experiment with the Gothic upgrade sprues. I remember adding a few of them to my Kickstarter, as I’d prefer to have too many than not enough. I was endlessly impressed by the modular nature of the whole kit – everything can be attached basically anywhere, which is a nightmare for someone who hates having too many options.
I compromised by adding a few gothic buttresses and lights to a roof and one of the bases just to see how the kits worked. I was very impressed by how well they all stacked up on top of each other.
It was starting to take shape, and the prospect of making harder decisions with the resources I had was daunting. I also wasn’t sure I had enough magnets to see me through the magnetisation process, and I didn’t want to be caught short.
The plan of attack for this building session was to get all the core stuff assembled – let’s see how tall I can make this sucker.
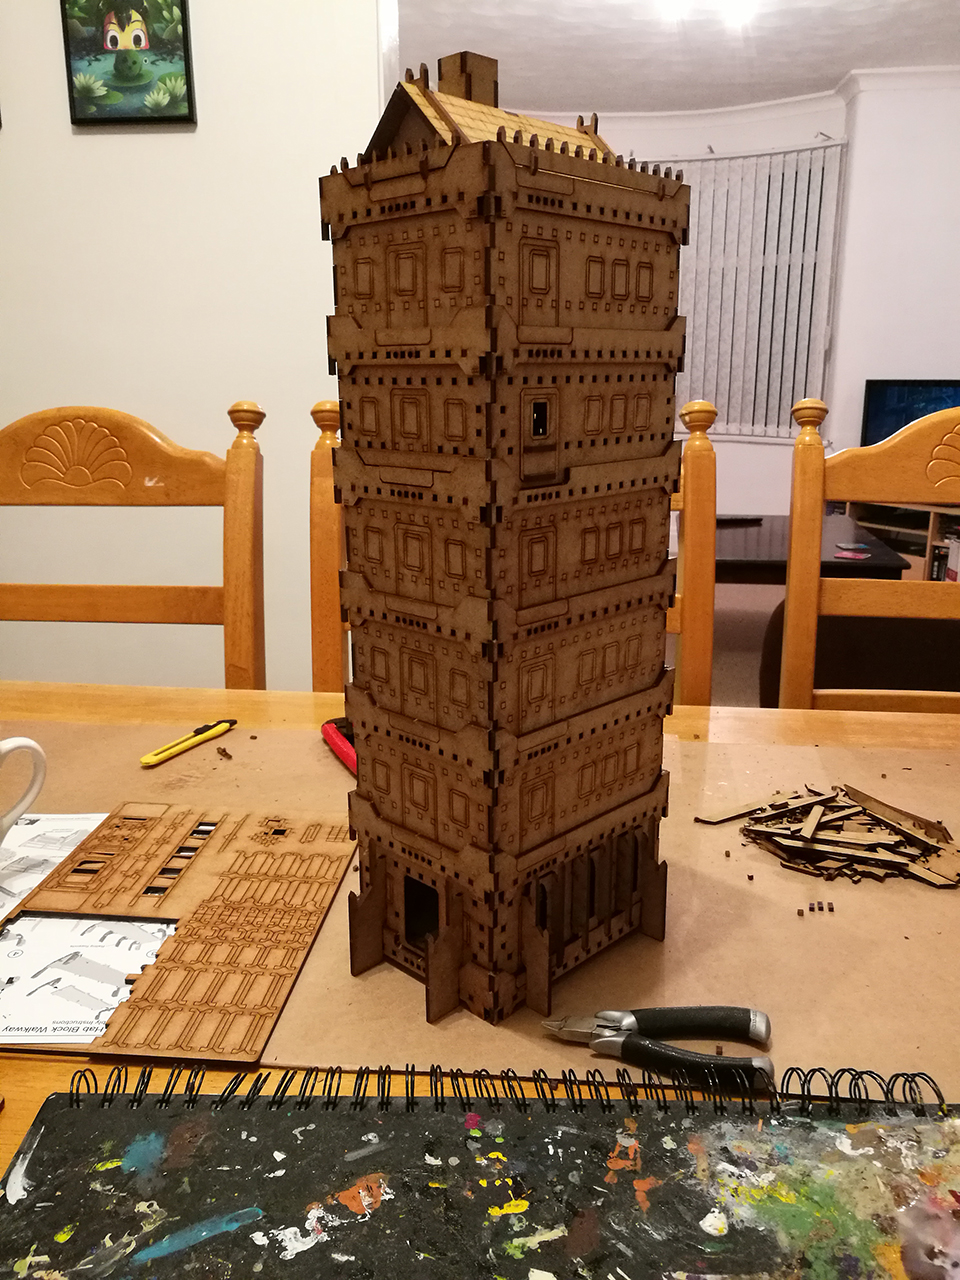
Turns out, quite tall. I already began visualising some daft things I could do with magnetised walkways coiling round the outside of this. It’s a terrible design for playing in, but it looks cool!
I was impressed with how well it all slotted together considering how slap-dash I was in assembly. I’m looking forward to having the whole kit together.
to be continued
This is where everything was left – all the hab pieces assembled with a couple of experimental Gothic parts added. Most of the walkways are tucked away waiting to have magnets added once I build up the courage to take them out of their box again.
Overall I’m very impressed with the kit. I can easily populate a board with them in ‘unstacked’ mode, but it remains to be seen how much I can cover once I start layering them up. As of a week or two ago, MAD have started selling the individual habs on their store, so depending on how it looks like when I’m finished, it’s nice to know I can always pick up a few extras to round off my collection.
As for construction, perhaps Christmas will have a few spare days for me to bite the bullet and finish the project off. Watch this space!
Hey there
I have just read the blog, thank you . Considering it was way way to late I’m pleased to read that so far the quality and possibilities of the Hab Block are pretty good, choice and freedom to build what you wanted was what I intended it to be. Also I know you could have gone on way more about how late it was but I appreciate how you have focused on the build and the quality. I completely understand the “ballache or tedious (or both) to assemble” I have made so so many just to make sure they are right and they work as I visioned them too.
I love this, its a perfect way of explaining how to build them…….”The assembly instructions were very useful, but when it came to optional parts the rules were “Go nuts” or “Check out our videos on Youtube for ideas”. I would like to share the idea’s as this will be the best way to show what can be done, I am really looking forward to what everyone come up with.
What i would like to ask is would it be ok to share this post when you have finished it and or through your progress.
Thank you for looking beyond the lateness and issue I had with the Kickstarter.
Regards
Andy
Absolutely! I’d love you to share 🙂 I’m hoping to get more done on this project over the Christmas break, and I’ve been watching your online shop with great interest. I’ll be in the market for some underhive terrain, and your stuff looks like it might just fit the bill…